
Download the Logical Wall Bin on Thangs
I needed a small garbage bin that I could mount exactly where I wanted it, without taking up floor or counter space. I also wanted it to be genuinely convenient: easy to use, quick to remove for emptying, and just as quick to put back.
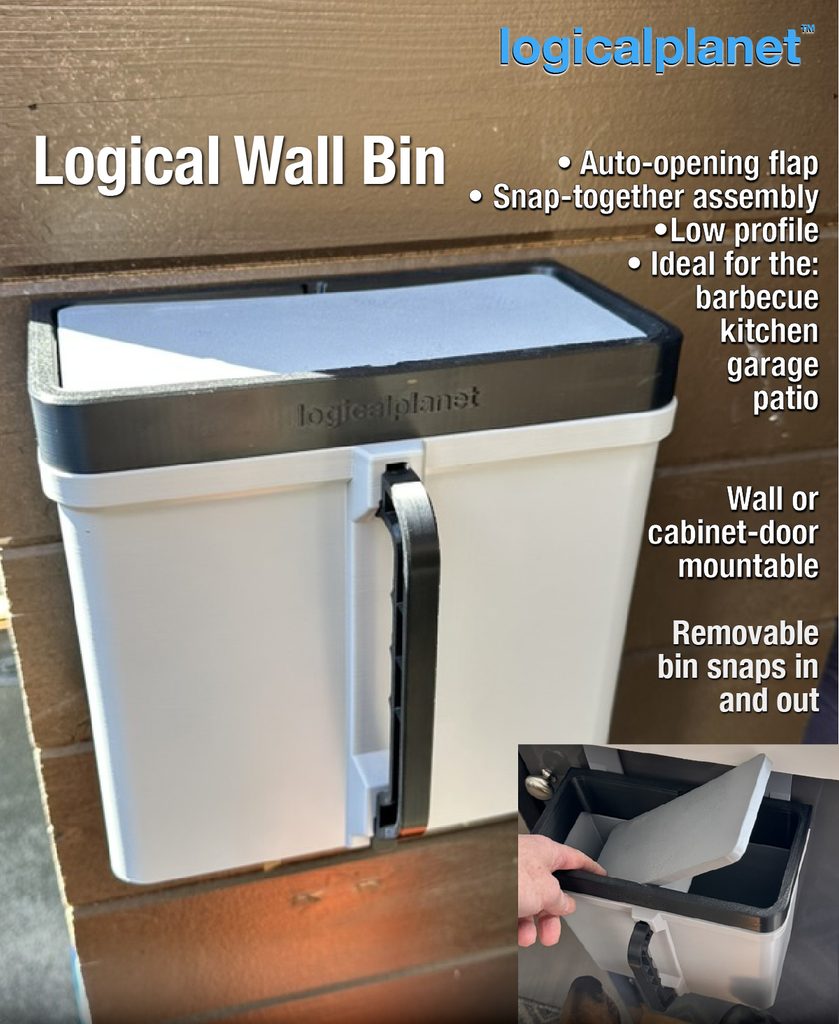
The lid—or more accurately, the flap—was the part that needed the most thought. It had to stay properly closed when the bin was sitting idle, but it could not take so much force to open that it got in the way of simply dropping something into the bin. The Logical Wall Bin is what I came up with.
A Small Bin for the Places That Need One
This is not intended to replace a full-size kitchen garbage can. It is a compact 4.5 L (1.2 gal) bin for the places where a small, conveniently positioned waste container is more useful: beside a barbecue, on a patio, in a workshop or garage, or on a kitchen cabinet door.
At 248 × 130 × 230 mm (9.8 × 5.1 × 9.1 in), it has a fairly low profile against the mounting surface. It can be permanently mounted to a wall or cabinet, or hung over a cabinet door without drilling into it.
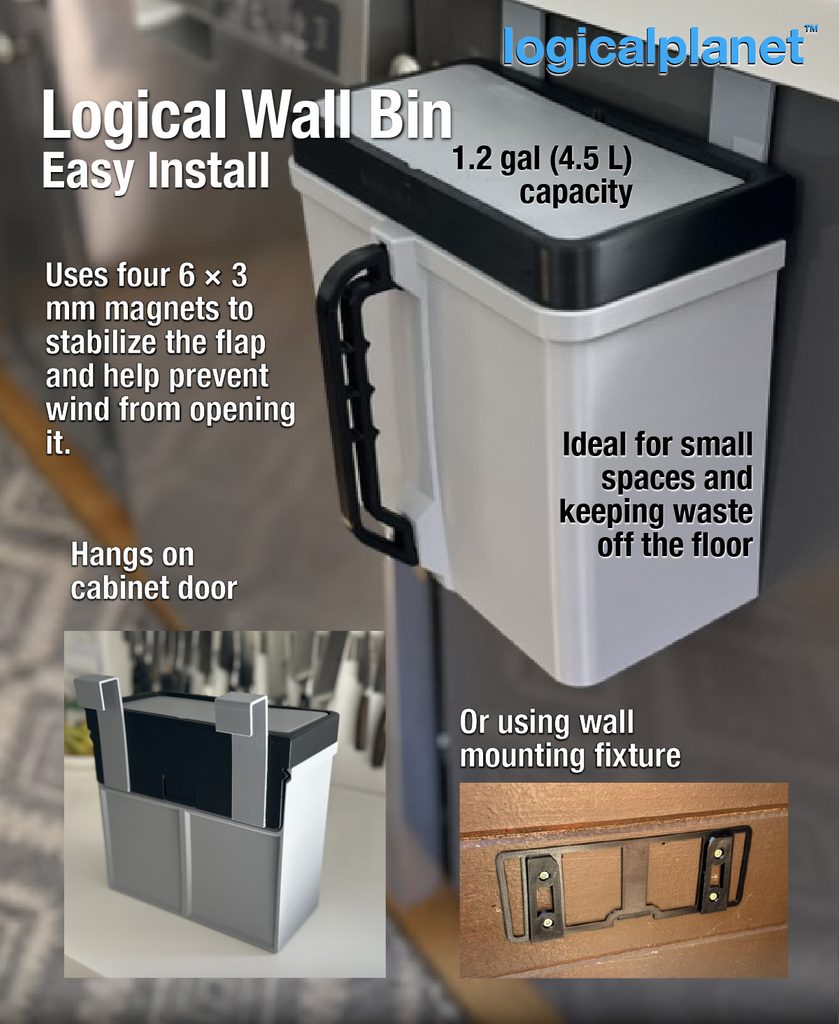
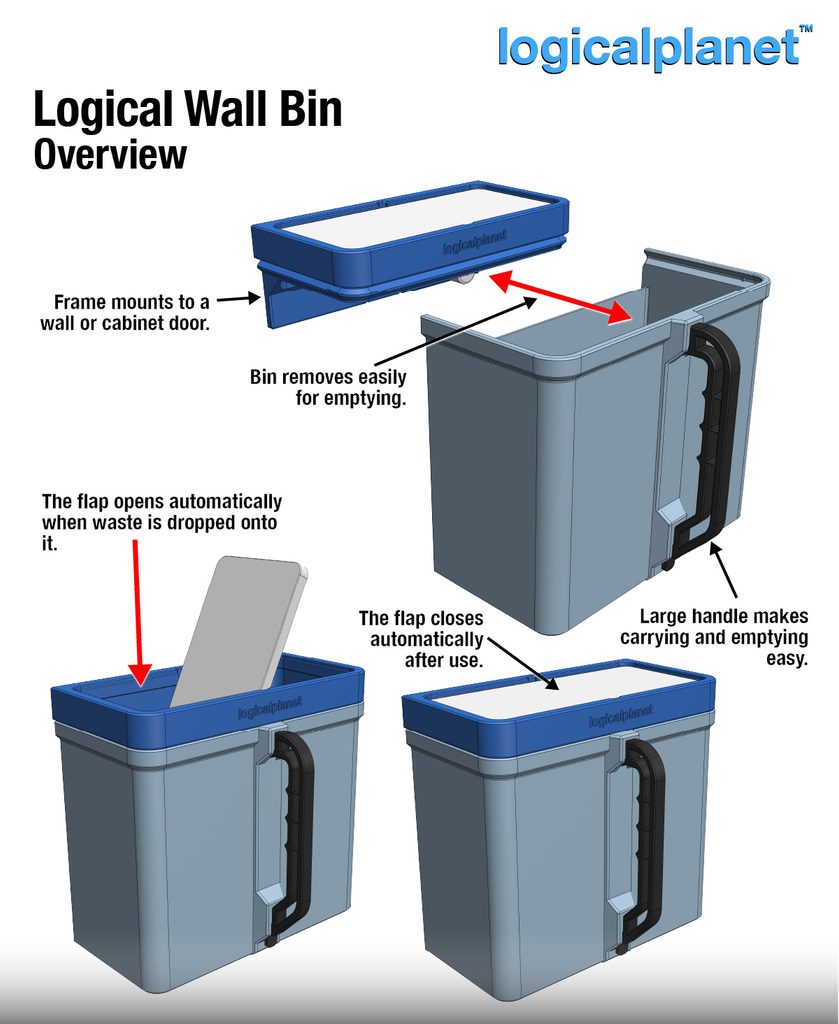
The bin itself lifts in and out of the upper frame, so taking it away for emptying or cleaning does not involve removing screws or disturbing the mounting hardware. A large snap-on handle makes it easy to carry once it is out of the frame.
That quick on-and-off action was one of my main objectives for the design. A wall-mounted bin is only convenient if emptying it is convenient too.
Drop Something In and the Flap Does the Rest
The top flap rests horizontally across the opening. Drop waste onto it and the weight rotates the flap open, allowing the waste to fall into the bin. Once the item has passed through, the flap returns to its closed position automatically.
There is no lid to lift by hand and nothing needs to be left standing open while you work.
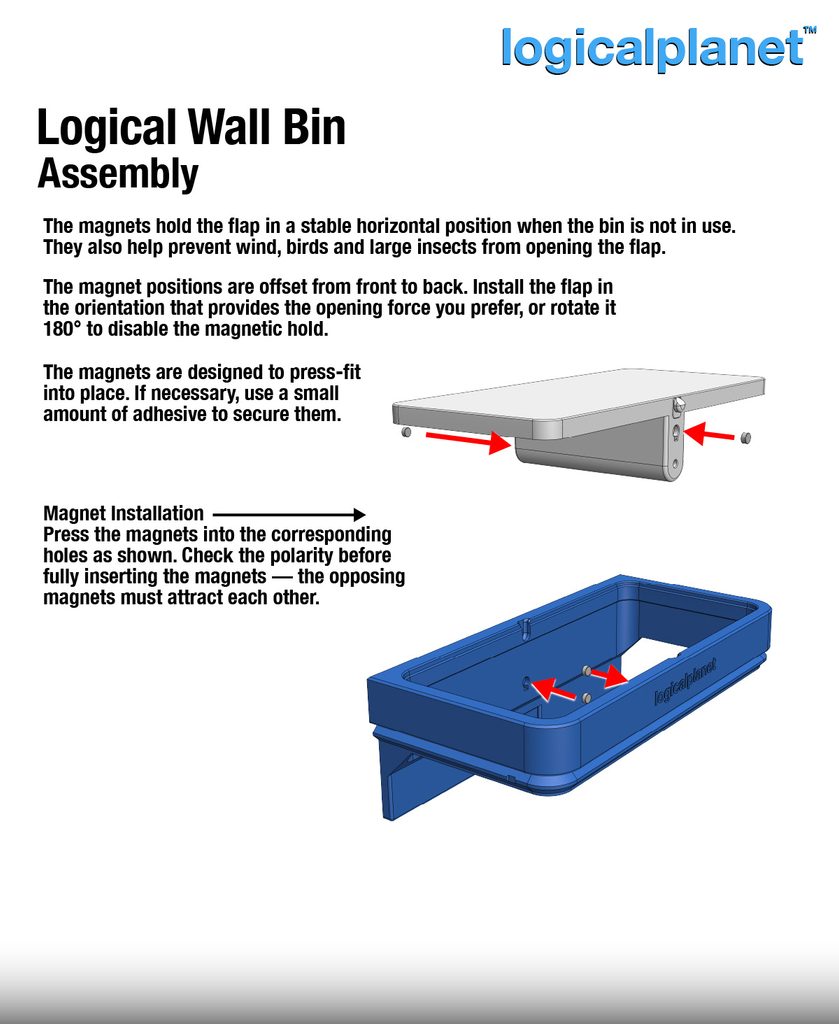
Four 6 × 3 mm magnets—two in the flap and two in the frame—hold the flap in a stable horizontal position. They also help prevent wind, birds and larger insects from pushing or pulling it open, which is useful when the bin is installed outdoors.
The goal was not simply to make the magnetic hold as strong as possible. Too much force would defeat the easy-opening action. I wanted enough holding strength to keep the flap properly closed, without making it an obstacle during normal use.
The magnet positions are offset from front to back, which gives you some control over the flap action. Install the flap in the direction that produces the opening force you prefer. You can also rotate it 180 degrees to disable the magnetic hold entirely.
Two Ways to Mount It
I designed the same bin frame to work with either a fixed wall mount or removable cabinet-door hangers.
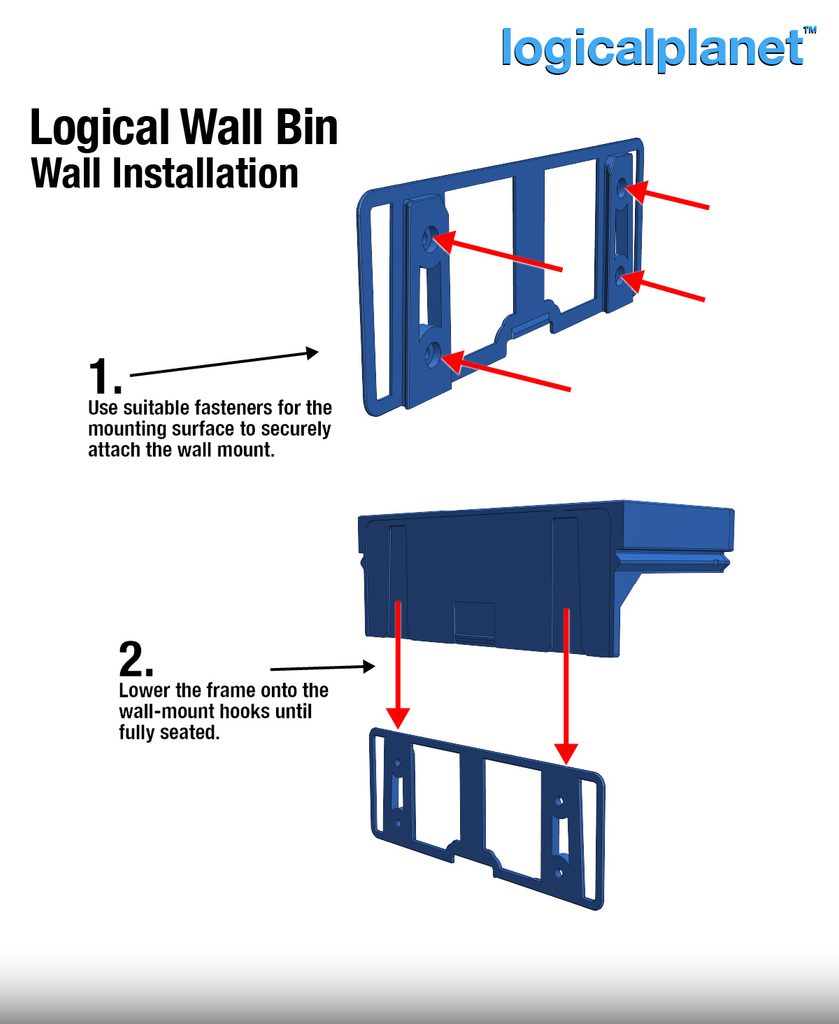
Wall mounting
The supplied wall fixture is attached with fasteners appropriate for the mounting surface. The upper frame then lowers onto the fixture’s hooks. This keeps the installation straightforward and allows the frame to be removed without taking the fixture off the wall.
Cabinet-door mounting
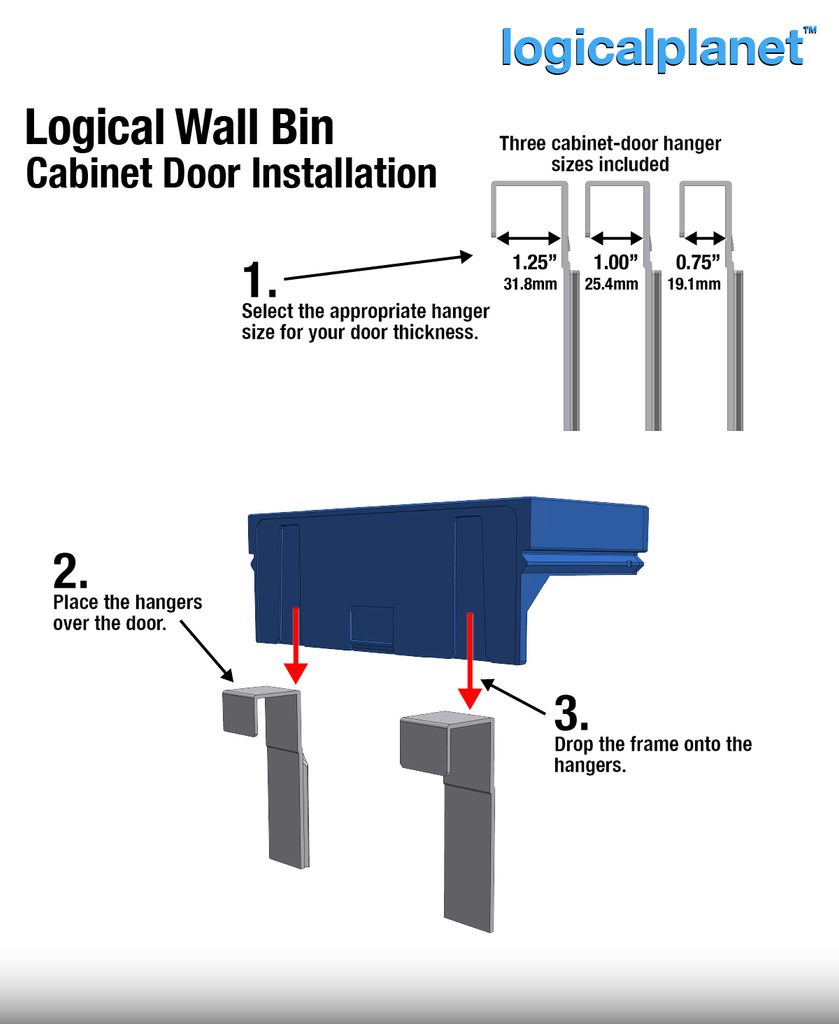
For installations where holes are not desirable, the files include hangers for three common door thicknesses:
- 19.1 mm (0.75 in)
- 25.4 mm (1.00 in)
- 31.8 mm (1.25 in)
Choose the hanger that matches your door, place a pair over the top edge, and lower the bin frame onto them.
The mounting choices make it easy to try the bin in a kitchen and later move it to a workshop, barbecue area or another location without needing a different bin.
Simple, Modular Assembly
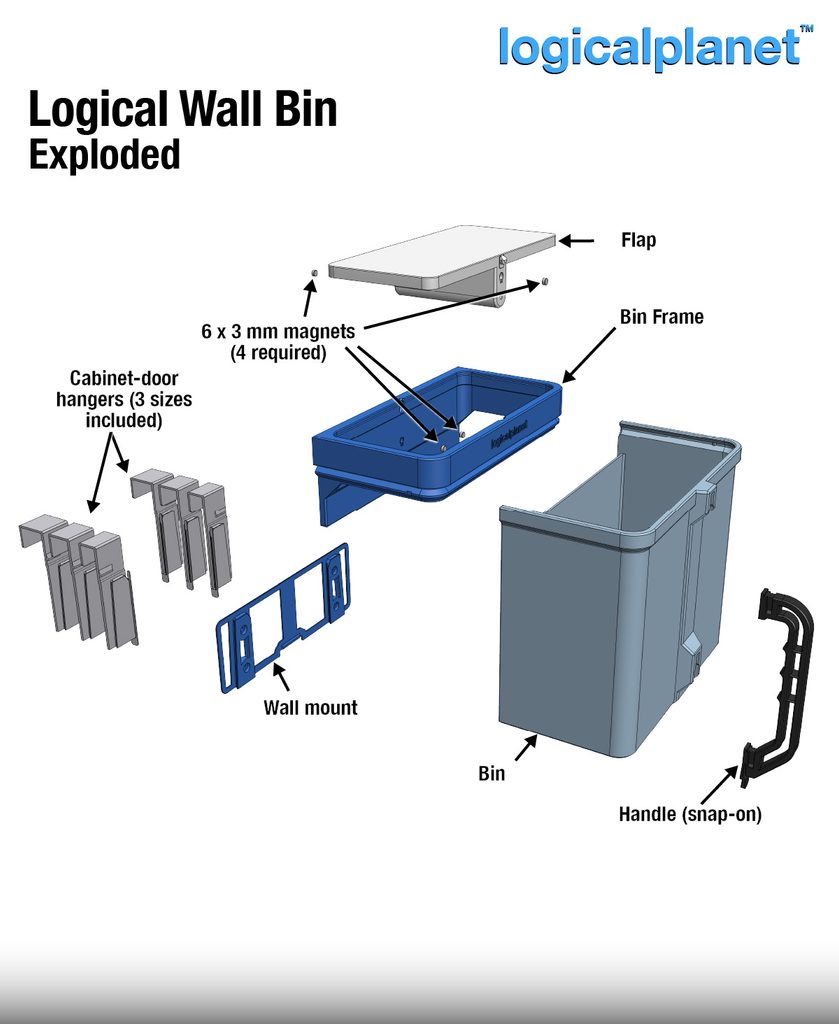
The design is divided into practical parts: the bin, upper frame, flap, handle, wall mount, and cabinet-door hangers. The exploded view below shows how the pieces relate to one another.
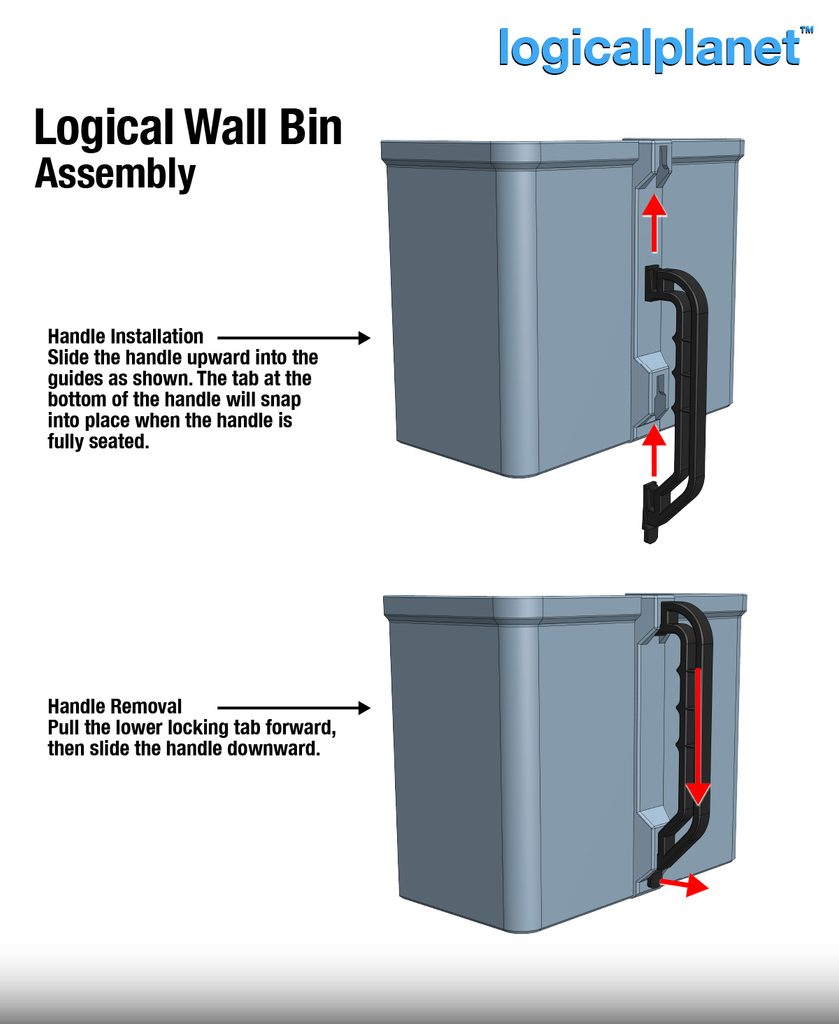
The handle slides upward into guides formed into the side of the bin. Once fully seated, its lower tab snaps into place. To remove it, pull the lower locking tab forward and slide the handle downward.
The four magnets are designed to press into their holes. Check the polarity before inserting them fully: each magnet in the flap needs to attract the corresponding magnet in the frame. If your printer’s tolerances leave them a little loose, a small amount of adhesive can be used to secure them.
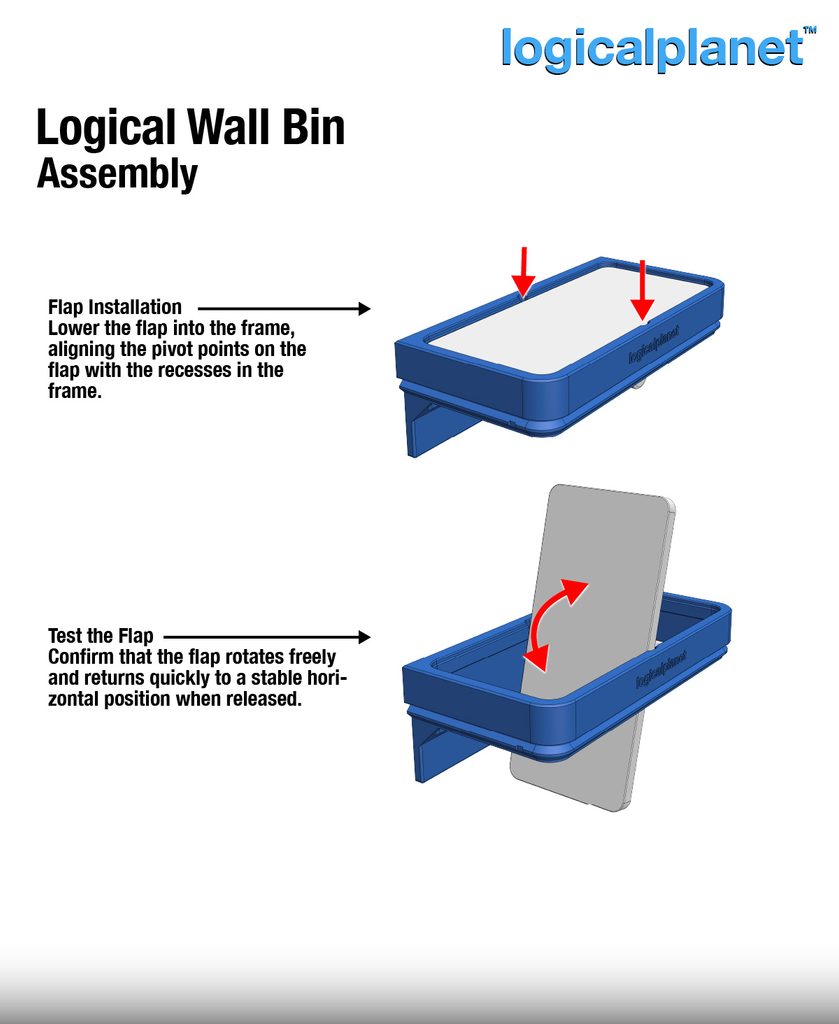
The flap then lowers into the frame, with its pivot points aligned to the matching recesses. Once installed, it should rotate freely and return quickly to a stable horizontal position when released.
Size and Capacity
The assembled Logical Wall Bin measures:
- Width: 248 mm (9.8 in)
- Depth: 130 mm (5.1 in)
- Height: 230 mm (9.1 in)
- Capacity: approximately 4.5 L (1.2 gal)
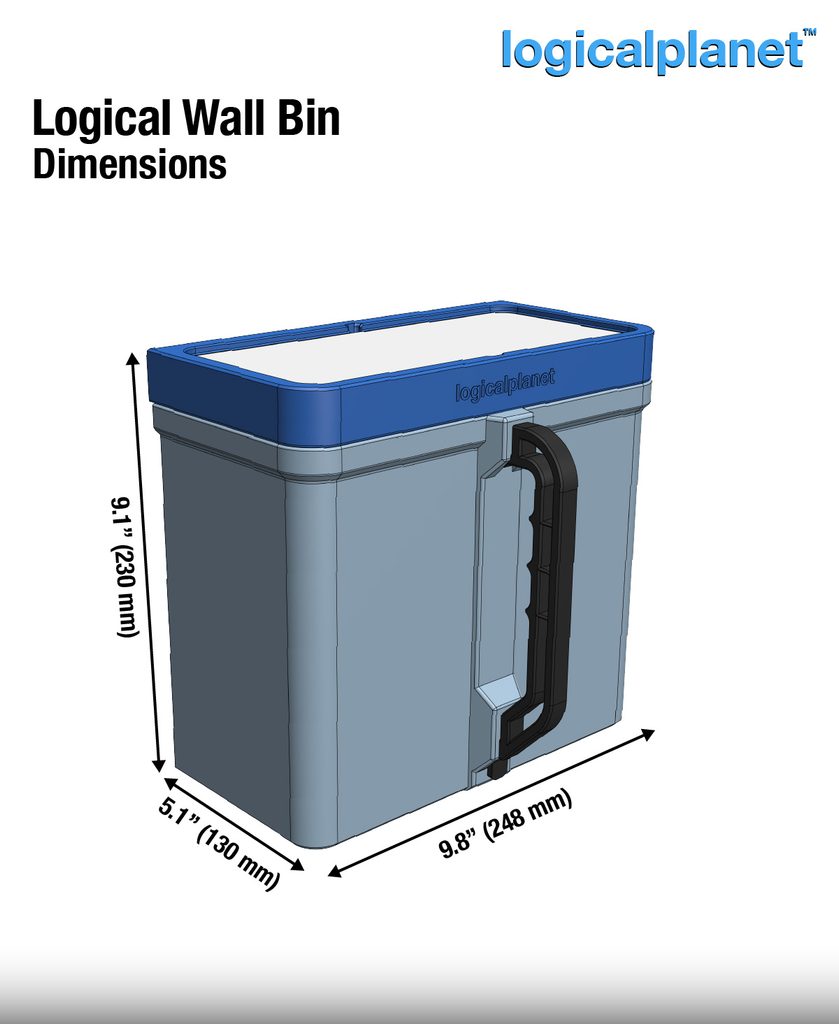
Its narrow depth keeps it from projecting too far into the room, while the height and width provide useful capacity for a small utility bin.
Printing the Logical Wall Bin
For indoor use, I recommend PLA or PETG. For outdoor installations, use ASA or another material suitable for prolonged heat, weather and UV exposure.
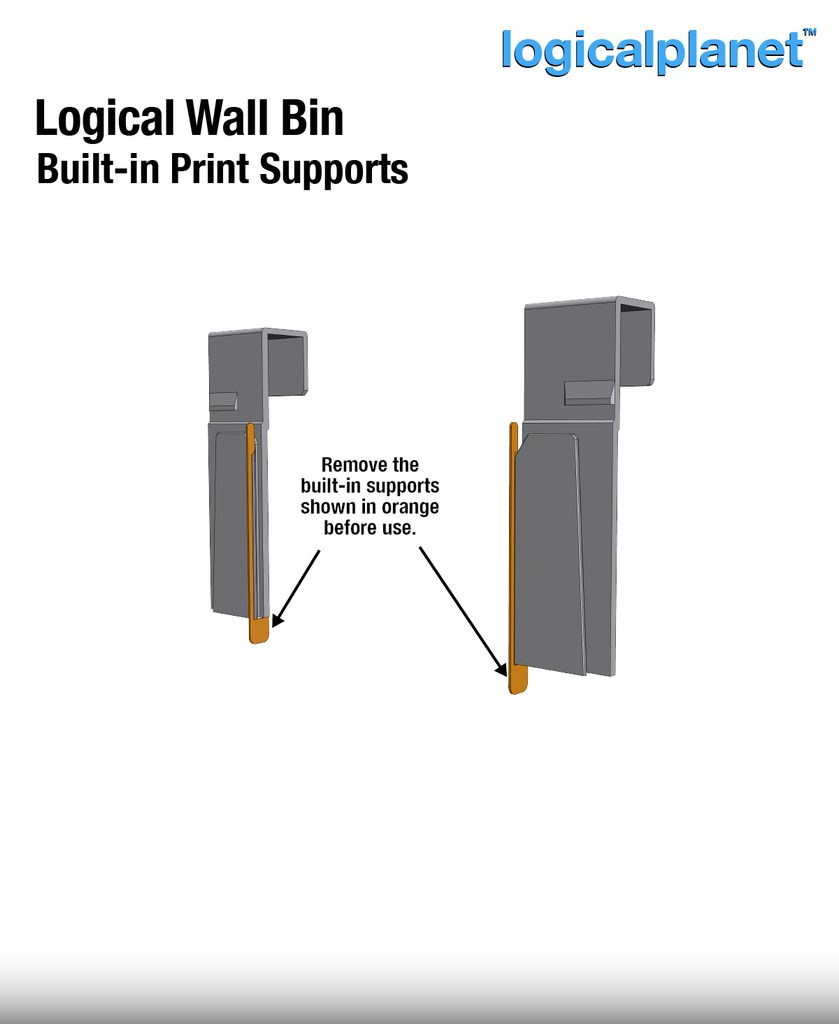
The parts are supplied in their intended print orientations. No slicer-generated supports are required; small built-in supports are already incorporated where needed. The orange areas shown below should be removed before installing the cabinet-door hangers.
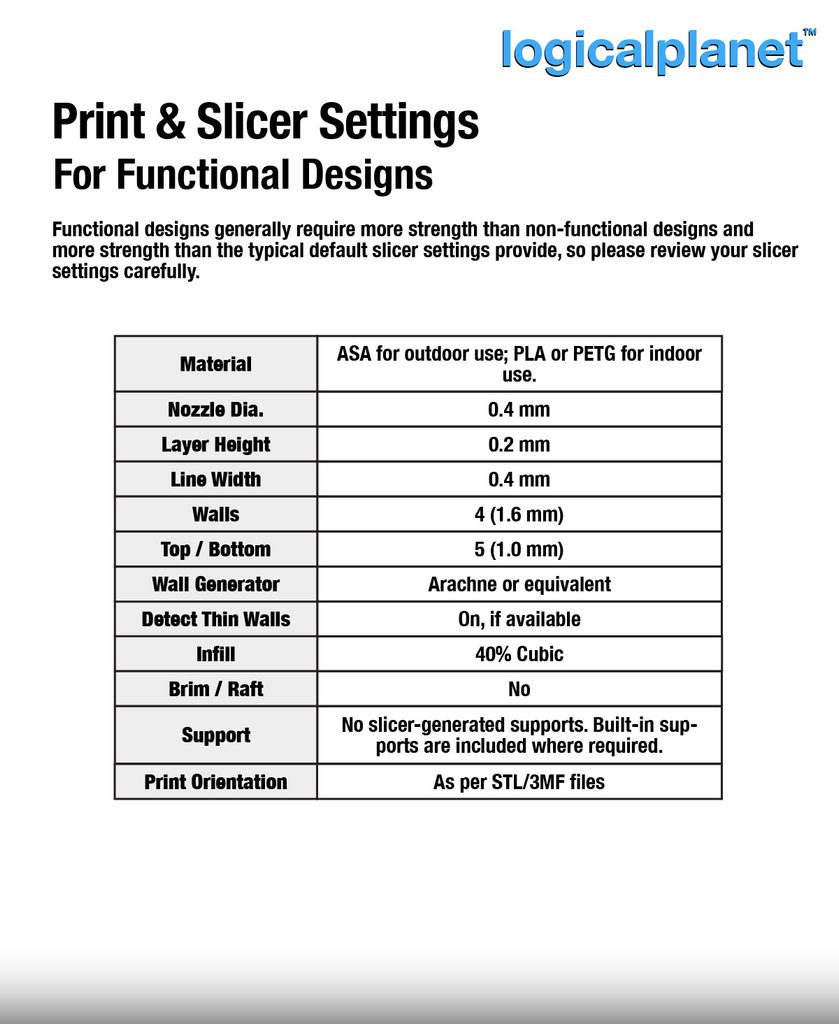
These are the recommended starting settings for the functional parts:
| Setting | Recommendation |
|---|---|
| Nozzle | 0.4 mm |
| Layer height | 0.2 mm |
| Line width | 0.4 mm |
| Walls | 4 (1.6 mm) |
| Top/bottom layers | 5 (1.0 mm) |
| Wall generator | Arachne or equivalent |
| Detect thin walls | On, if available |
| Infill | 40% cubic |
| Brim/raft | No |
| Slicer-generated supports | No |
| Print orientation | As supplied in the STL/3MF files |
Functional prints often need more strength than ordinary decorative models, so it is worth checking these settings rather than relying automatically on a slicer’s default profile.
The Result
This started with a very ordinary need: I wanted a small garbage bin in a useful location. As often happens, the interesting part was working through all the details that turn the basic object into something pleasant to use.
The removable bin and handle make emptying easy. The alternative mounts make installation flexible. Most importantly, the balanced flap gives the bin a simple automatic action without electronics, springs or a complicated linkage.
Download the Logical Wall Bin on Thangs
If you print one, I would be interested to hear where you install it and how you use it. You can reach me at logicalplanet3d@gmail.com, or follow the LogicalPlanet community links at logicalplanet.com.
Leave a Reply