
A Large, Expandable Structure Made with 3D Printing
Download the Logical Scissor Gate on Thangs:
https://than.gs/m/1604570?affiliateCode=logicalplanet
I made the Logical Scissor Gate mostly because I thought it would be awesome—and it is.
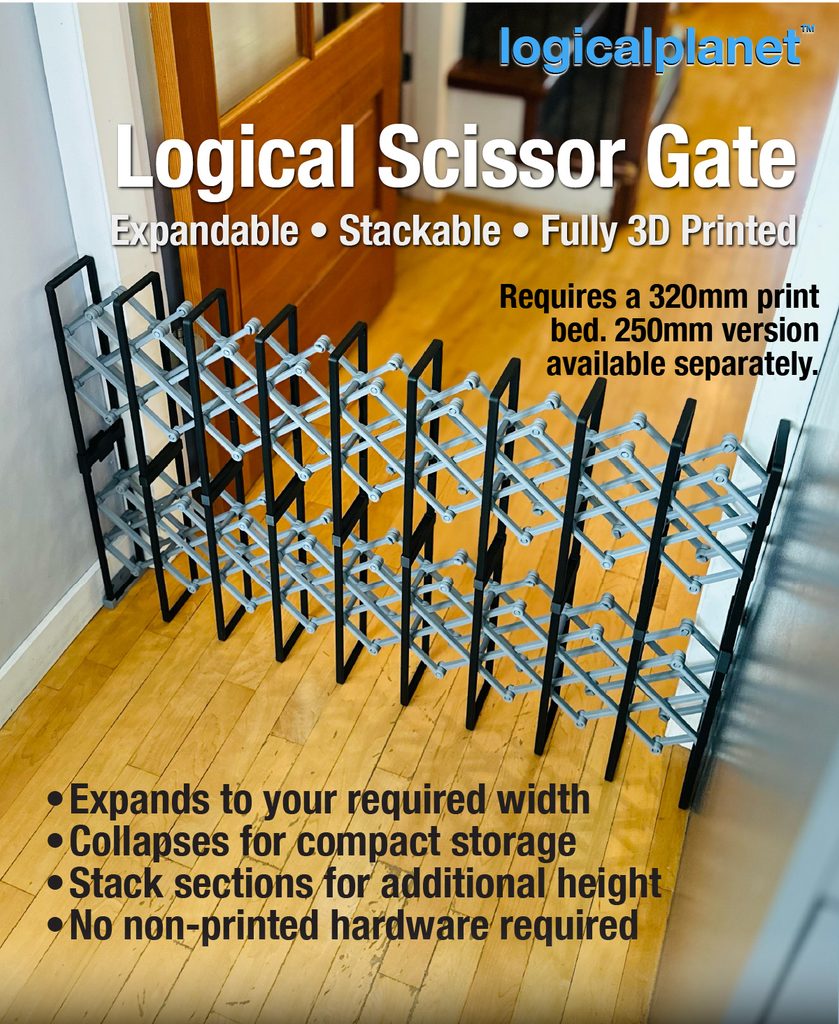
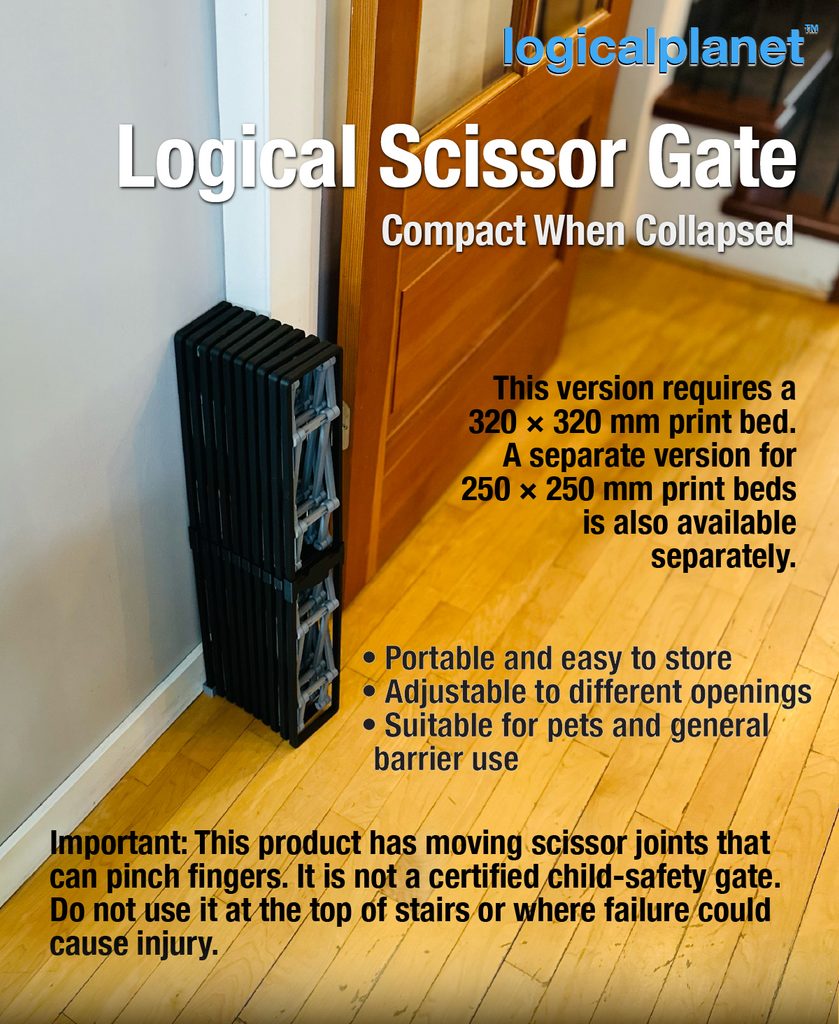
A large, functional structure built almost entirely with 3D-printed parts feels like an incredible leap forward from where I began with 3D printing not that many years ago. This is not a small gadget or a decorative model. It is a working expandable barrier that can cross a substantial opening, collapse into a compact package and even be stacked to create additional height.
Inspired by the gates I saw in China
I have always liked this particular style of scissor gate. I saw them used extensively in China and was immediately struck by their usefulness.
The scissor gates I grew up seeing were usually thin, flat barriers that depended heavily on being attached to a wall. The Chinese gates that caught my attention were very different. They used thick, repeating frames that allowed the structure to support and stabilize itself. Some were large enough to cordon off an entire parking lot, yet they could still collapse into a relatively compact space when not needed.
That combination of scale, movement and compact storage stayed with me. It also made the design a particularly interesting challenge for 3D printing: could I reproduce the same basic structural idea as a modular system made from printable components?
A gate built one bay at a time
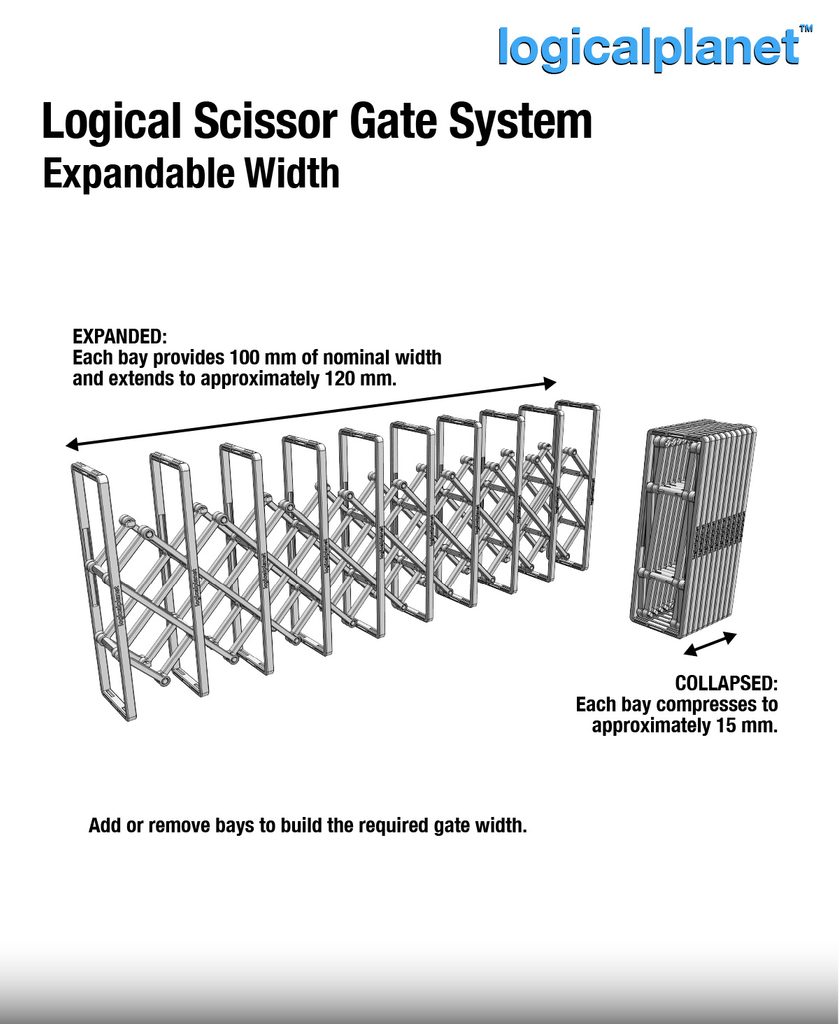
The Logical Scissor Gate is not designed around one fixed opening. Its width is created by adding or removing repeating bays, so the same basic components can be used to build gates of different lengths.
Each bay provides 100 mm of nominal width and can extend to approximately 120 mm. When collapsed, each bay compresses to approximately 15 mm. That gives the finished gate a useful range of movement while keeping it surprisingly compact when folded.
A nominal 1 metre gate contains ten 100 mm bays and can extend to approximately 1.2 metres.
Stackable as well as expandable
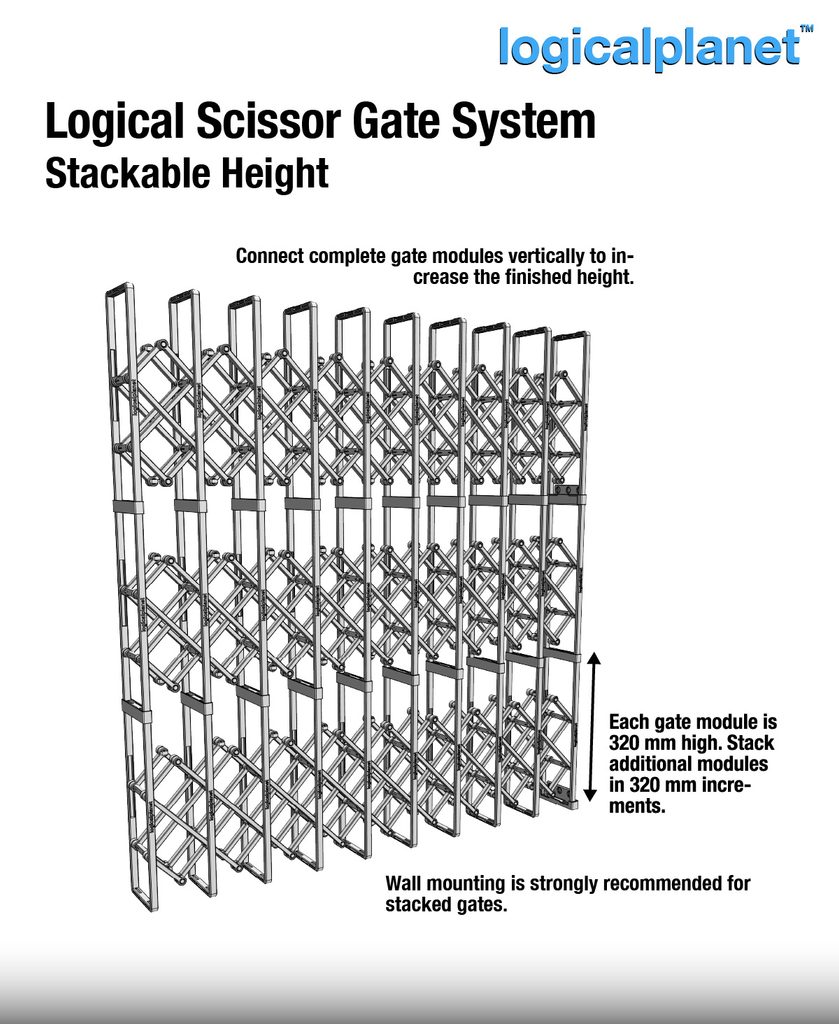
Width was only part of the idea. Complete gate modules can also be connected vertically, allowing the finished barrier to be built in 320 mm height increments.
Printed Stackers join the Frames of one module to the Frames of the module above it. This makes the system adaptable in two directions: repeat the bay pattern to change the width, and stack complete modules to change the height.
Although a single module can stand independently for light-duty barrier use, wall mounting is strongly recommended for stacked gates. Increasing the height also increases the load on the Frames, Stackers and mounts.
A fully printed mechanical system
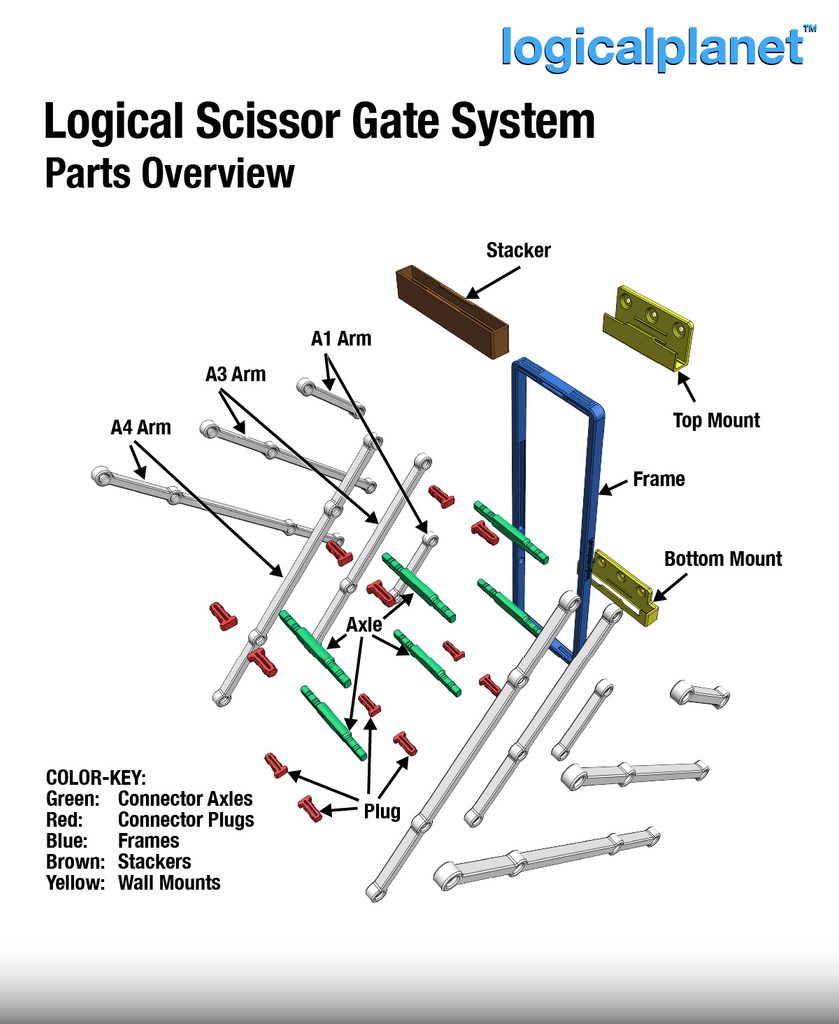
One of my favourite things about the project is that the gate itself does not require conventional non-printed hardware. The moving structure is assembled from printed Arms, Connector Axles, Connector Plugs and Frames. Stackers and optional wall-mounting parts extend the system further.
The core parts are:
- A1 Arms
- A3 Arms
- A4 Arms
- Frames
- Connector Axles
- Connector Plugs
- Stackers for connecting modules vertically
- Top and Bottom Mounts for securing the gate to a suitable surface
The crossed arm layers pivot on the printed axles, while the repeating Frames give the structure its depth and help it remain upright. That three-dimensional frame arrangement is what makes this design feel so different from a thin, wall-mounted scissor gate.
Planning the size of a gate
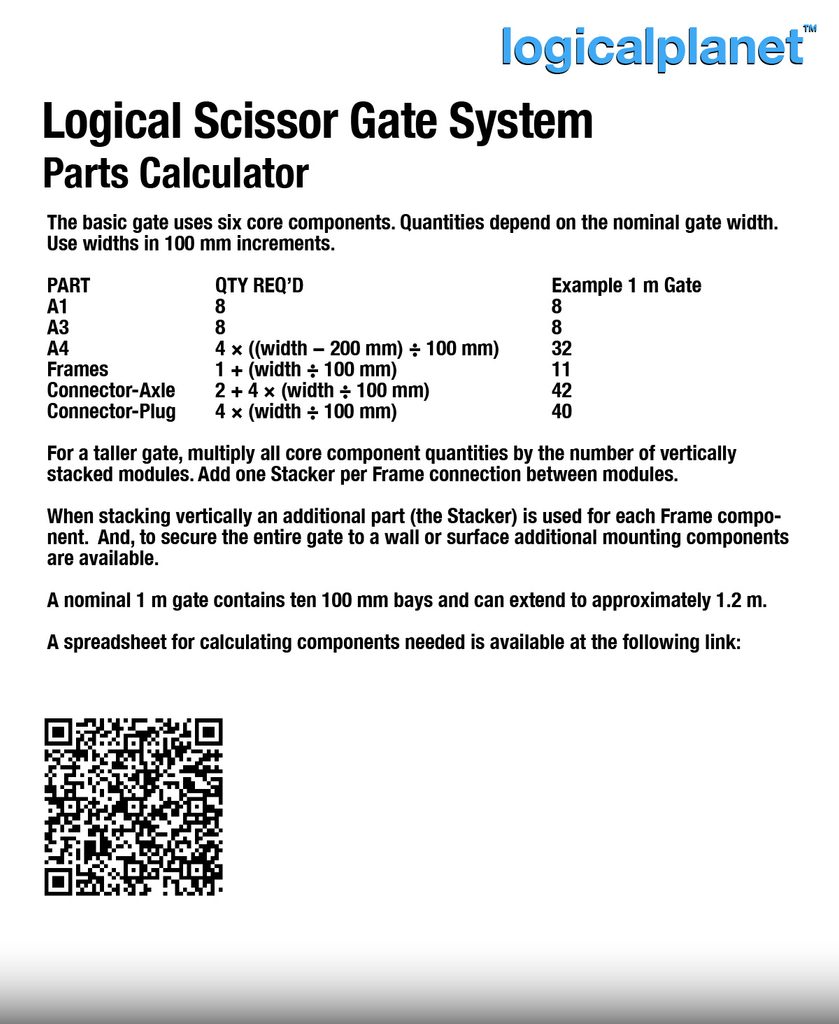
Because the design is modular, the number of parts depends on the finished width and the number of vertically stacked modules. I created a parts calculator to make that planning easier.
For a basic gate, quantities are calculated in 100 mm nominal-width increments. A taller gate multiplies the core component quantities by the number of modules, with one Stacker required at each Frame connection between modules.
The calculator link is included with the model documentation on Thangs.
How the gate goes together
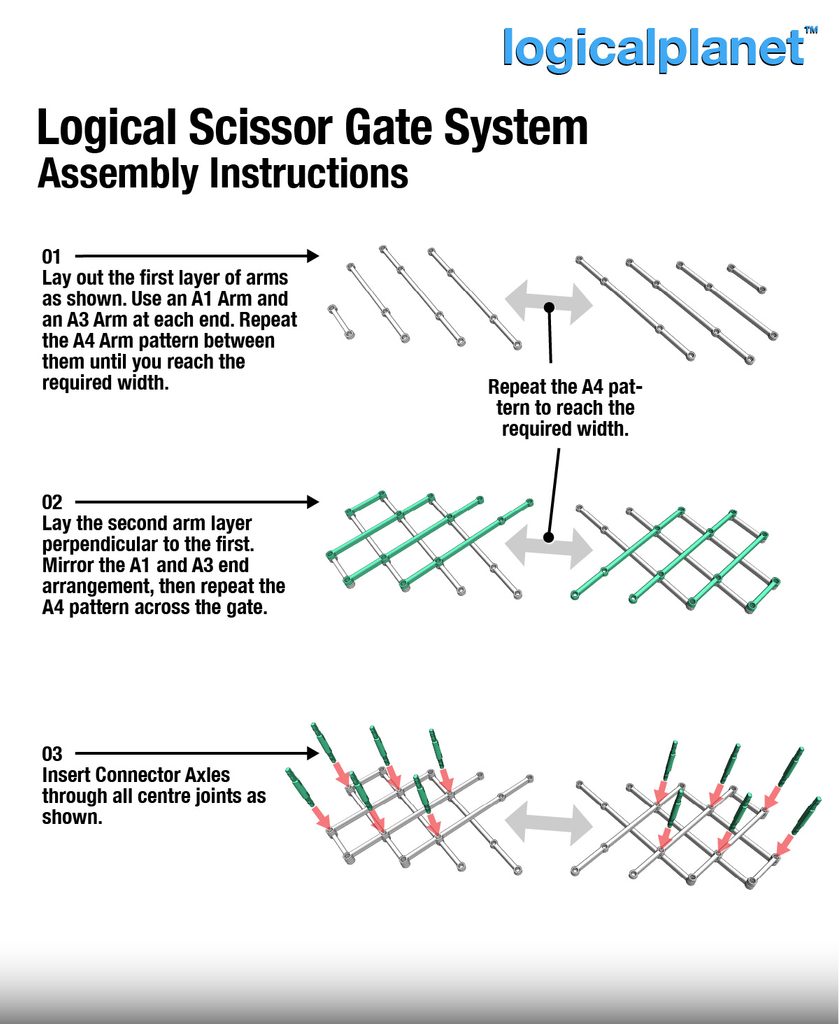
Assembly begins by laying out the first arm layer. An A1 Arm and A3 Arm form the ends, while the A4 pattern repeats between them until the required width is reached.
A second arm layer is placed perpendicular to the first, and Connector Axles are inserted through the centre joints.
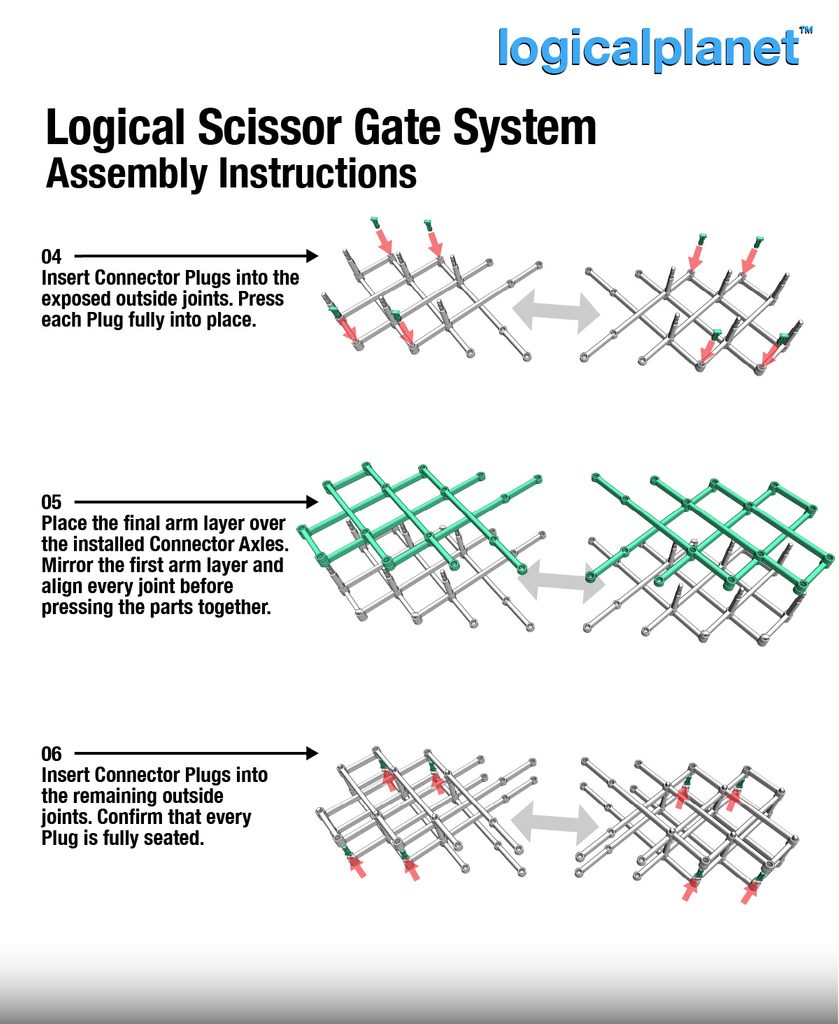
Connector Plugs secure the exposed outside joints. The final arm layer is then aligned over the Connector Axles, and the remaining outside joints are completed with additional Plugs.
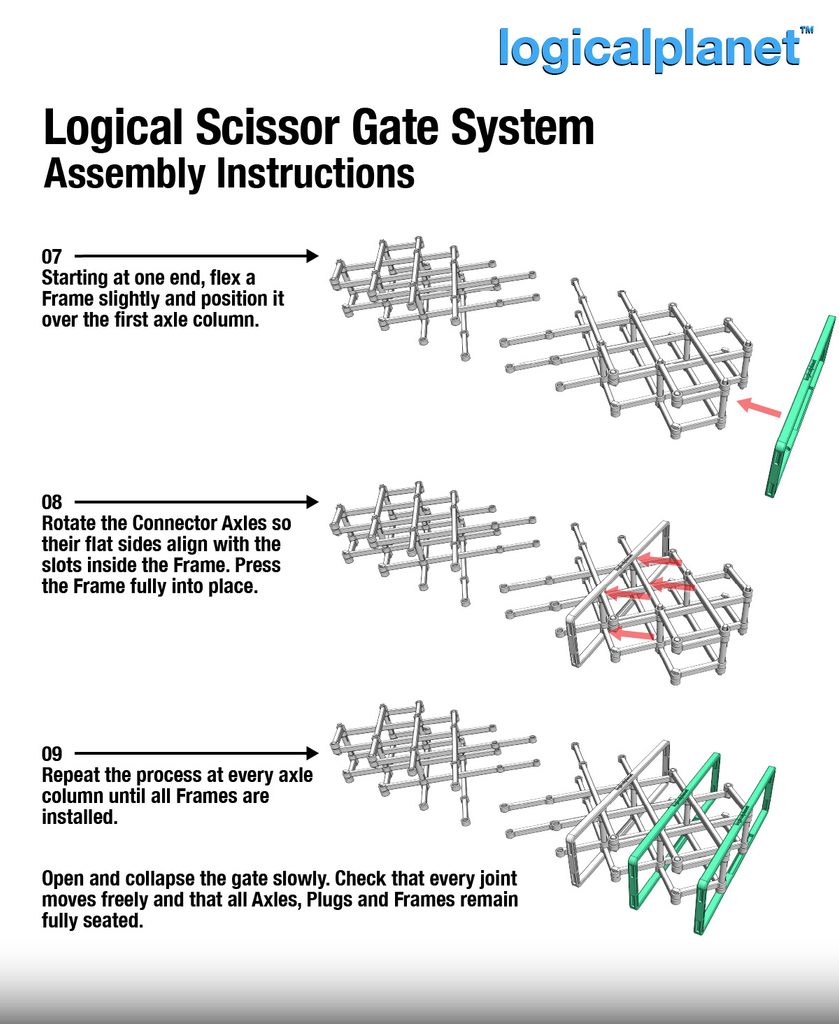
The Frames are installed one axle column at a time. Each Frame flexes slightly into position, then locks onto the flat-sided Connector Axles. Once all the Frames are installed, the gate can be opened and collapsed slowly to confirm that every joint moves freely and all Axles, Plugs and Frames remain fully seated.
Connecting modules vertically
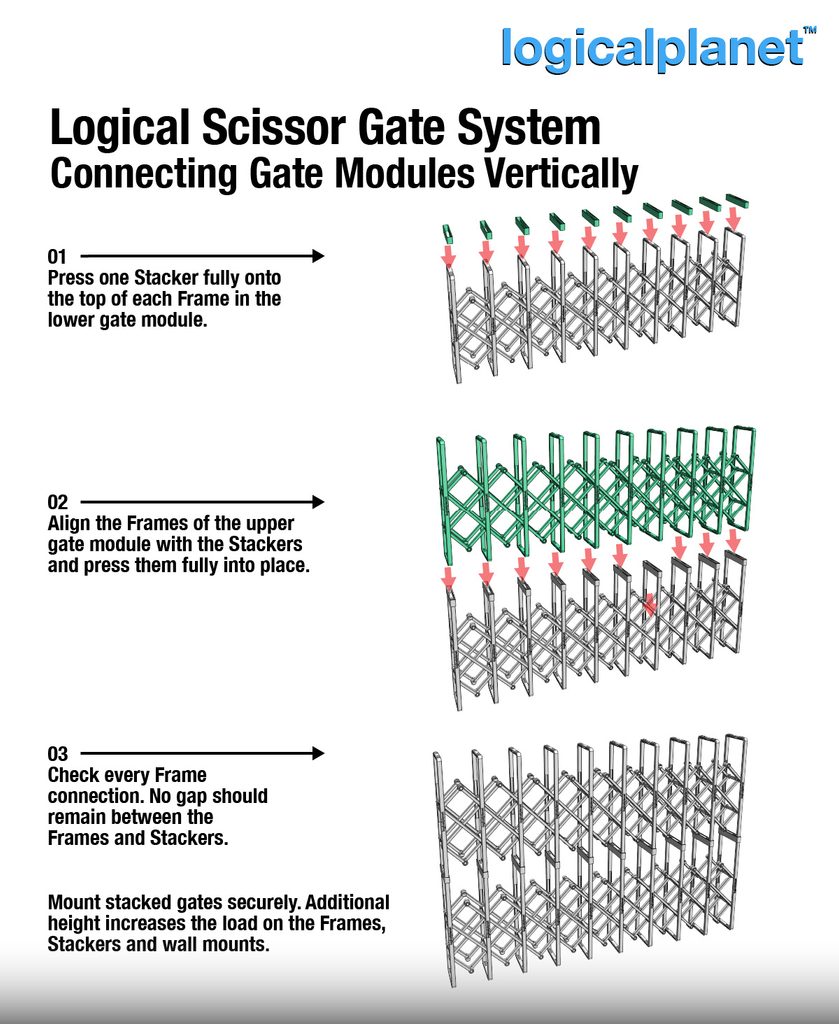
To build a taller gate, a Stacker is pressed onto the top of every Frame in the lower module. The Frames of the next module align with those Stackers and press fully into place.
Every connection should be checked carefully. There should be no gap between a Frame and its Stacker, and a stacked gate should be mounted securely.
Optional wall mounting
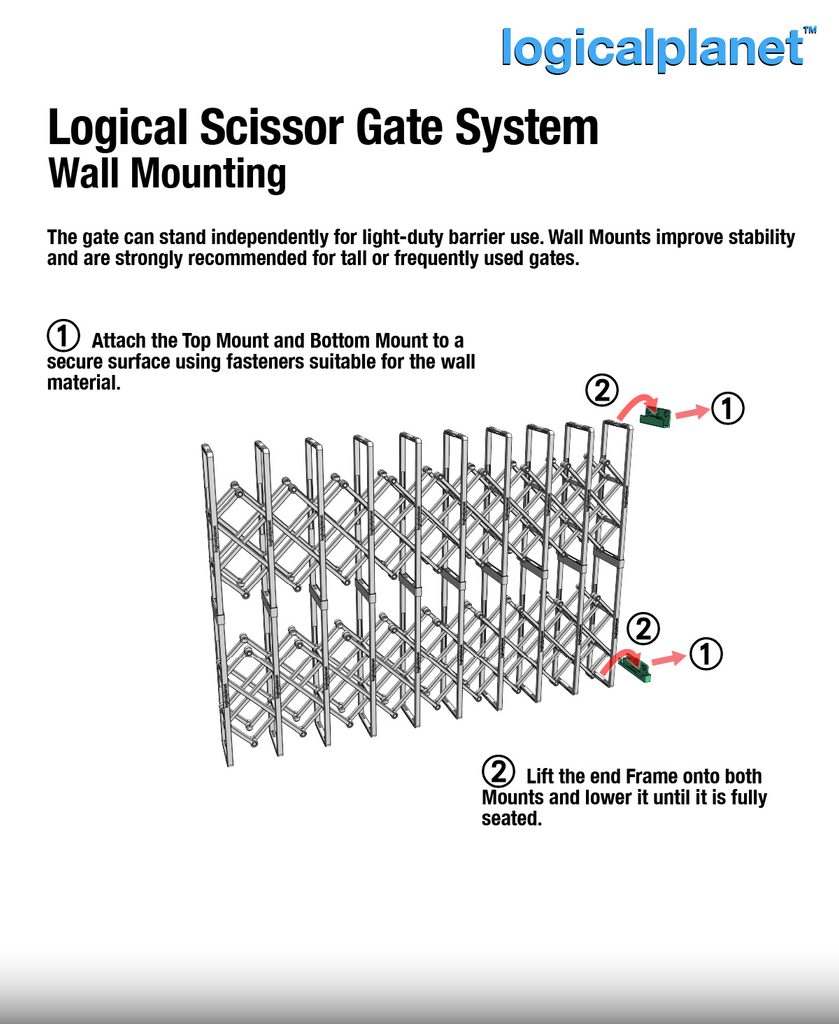
For a frequently used or taller gate, I strongly recommend using the Top and Bottom Mounts. They attach to a secure surface using fasteners appropriate for that wall material. The end Frame then lifts onto the two mounts and lowers into its seated position.
The correct screws and anchors will depend on the mounting surface, so those fasteners are not specified as part of the printed system.
Printing recommendations
This version of the gate requires a 320 × 320 mm print bed. I also made a separate version for 250 × 250 mm print beds.
The parts are designed to print without supports when the supplied STL or 3MF orientation is used. These are functional components, so they should be printed more substantially than a typical decorative model.
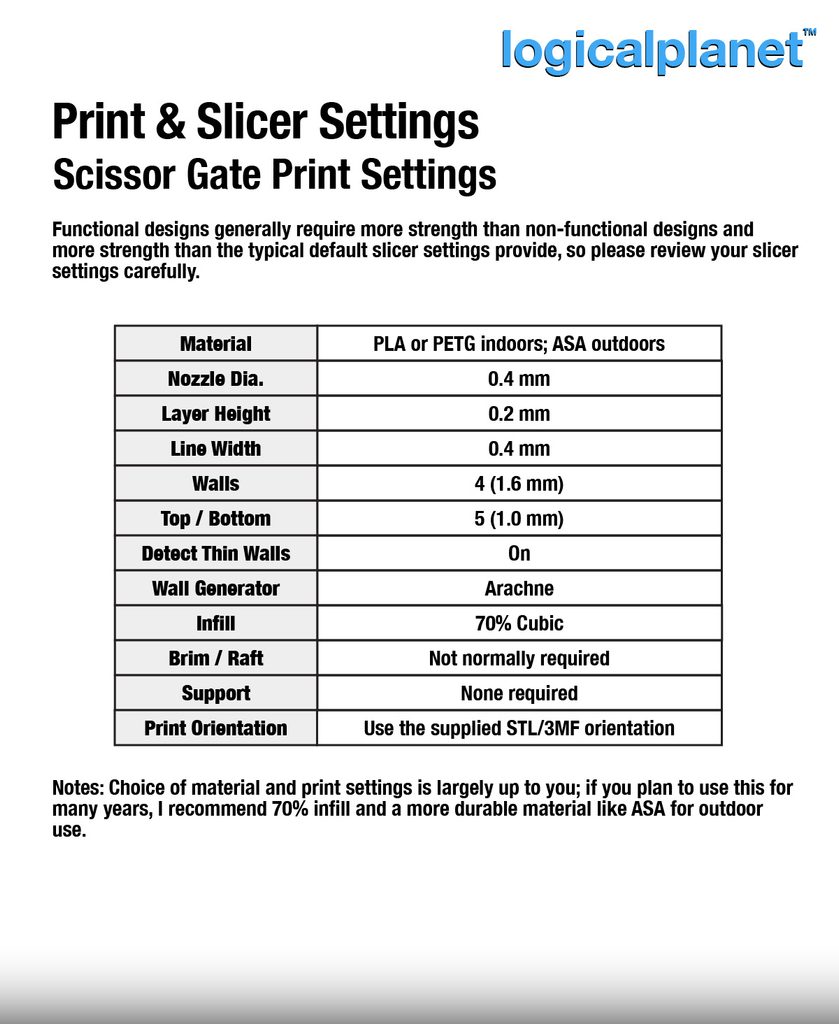
My recommended starting settings are:
- Material: PLA or PETG for indoor use; ASA for outdoor use
- Nozzle: 0.4 mm
- Layer height: 0.2 mm
- Line width: 0.4 mm
- Walls: 4, providing 1.6 mm total wall thickness
- Top and bottom layers: 5, providing 1.0 mm total thickness
- Detect thin walls: On
- Wall generator: Arachne
- Infill: 70% cubic
- Brim or raft: Not normally required
- Supports: None required
- Orientation: Use the supplied STL/3MF orientation
Material choice and print settings are ultimately up to the person making the gate and the intended use. For something expected to remain in service for years, I recommend the higher infill and a more durable, weather-resistant material such as ASA for outdoor use.
An important safety note
The Logical Scissor Gate contains moving scissor joints that can pinch fingers. It is not a certified child-safety gate and must not be used at the top of stairs or anywhere a failure could cause injury.
It is best treated as a configurable general-purpose barrier. The appropriate size, material, mounting method and level of supervision depend on where and how it will be used.
Why this project matters to me
This is one of those designs that reminds me why I became so interested in 3D printing in the first place.
Not that long ago, I was amazed simply to watch a printer produce a small usable object. Now I can design a large mechanical structure made from many repeatable printed components—a structure that expands, collapses, stacks and can be adapted to the space where it is needed.
There is something deeply satisfying about watching all those individual printed parts become one coordinated mechanism. The fact that it looks and moves like the substantial scissor gates that originally inspired me makes it even better.
And yes, I still think it is awesome.
Download the Logical Scissor Gate on Thangs:
https://than.gs/m/1604570?affiliateCode=logicalplanet
If you build one, I would love to see how you configure it and what you use it for. You can also find more of my designs at logicalplanet.com or contact me at logicalplanet3d@gmail.com.
Leave a Reply