
If you’ve ever stripped out the screw holes on a printed scraper handle, or fumbled with a three-piece assembly while holding a razor-sharp blade, these designs are for you. The Logical Scraper comes in two models — one for those who want adjustable blade angles, and one for those who just want to print and get to work.
Download Scraper A (Affiliate Link) Download Scraper B (Affiliate Link)
Overview
A better scraper for 3D printing beds — no screws, no stripped holes, no fuss. The Logical Scraper series solves the two biggest problems with printed scraper handles: stripped fastener holes and multi-piece assembly. Both models use a snap-fit, tool-free design and accept standard 32 mm × 23 mm scraper blades.
What It Is & How It Works
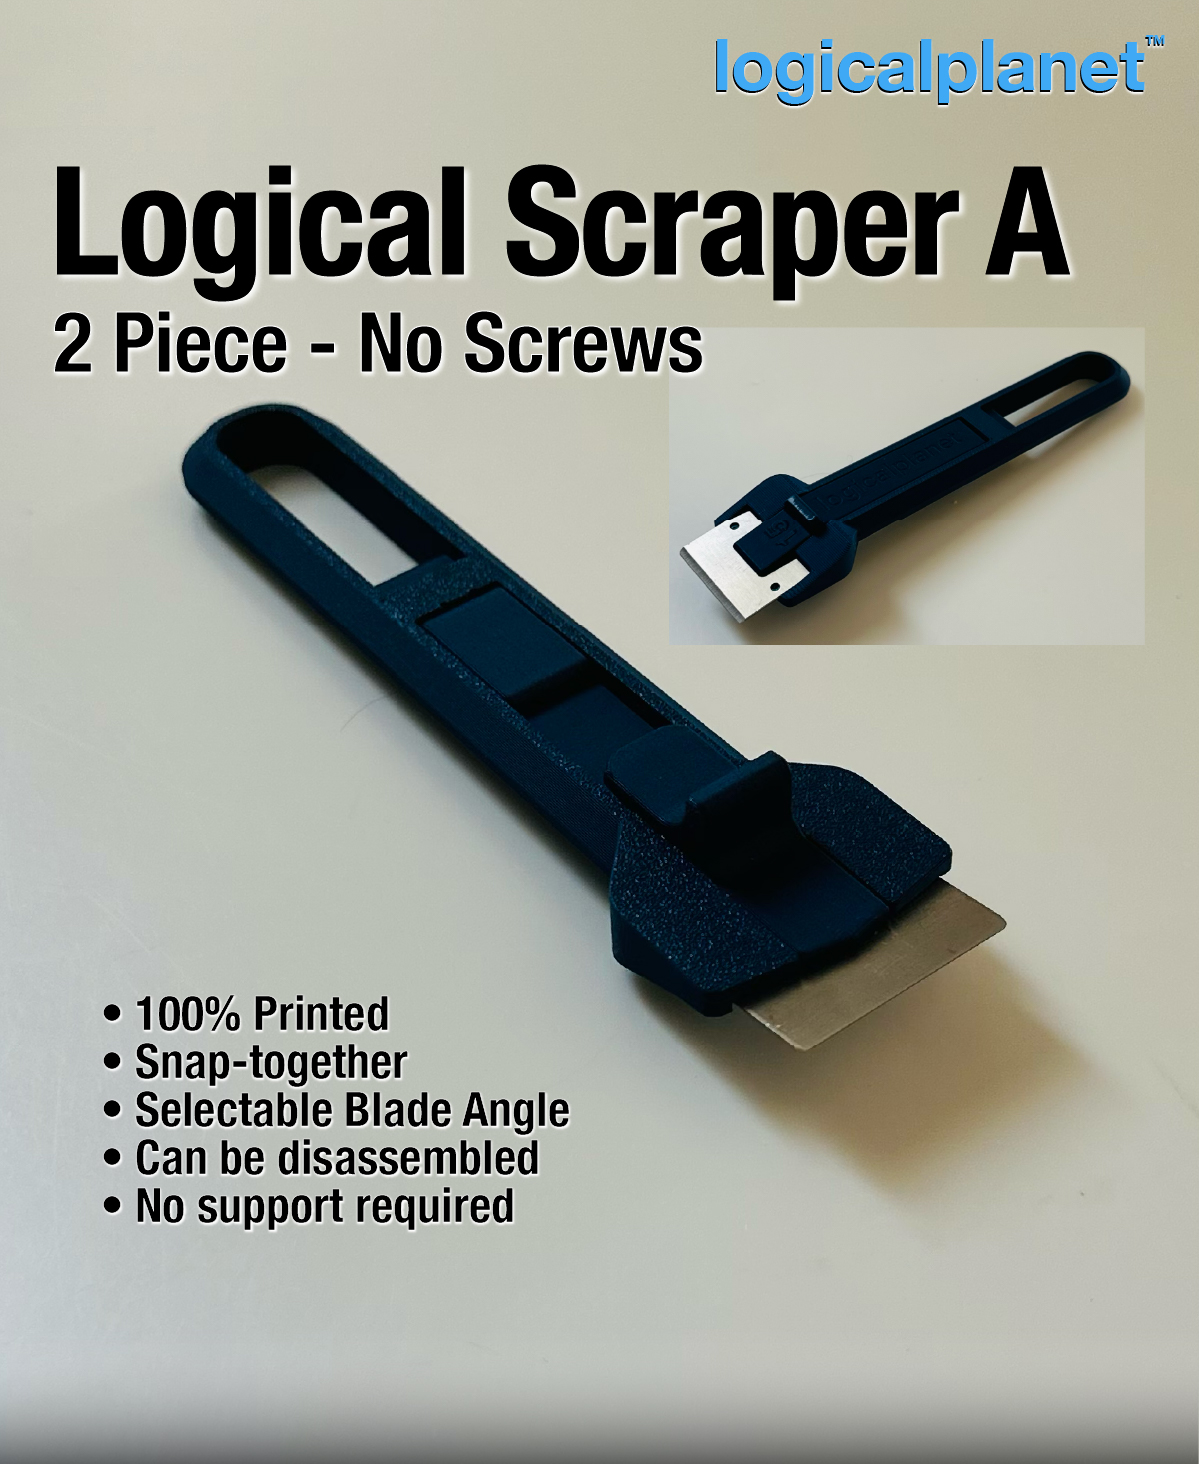
Model A — 2 Piece, Adjustable Angle
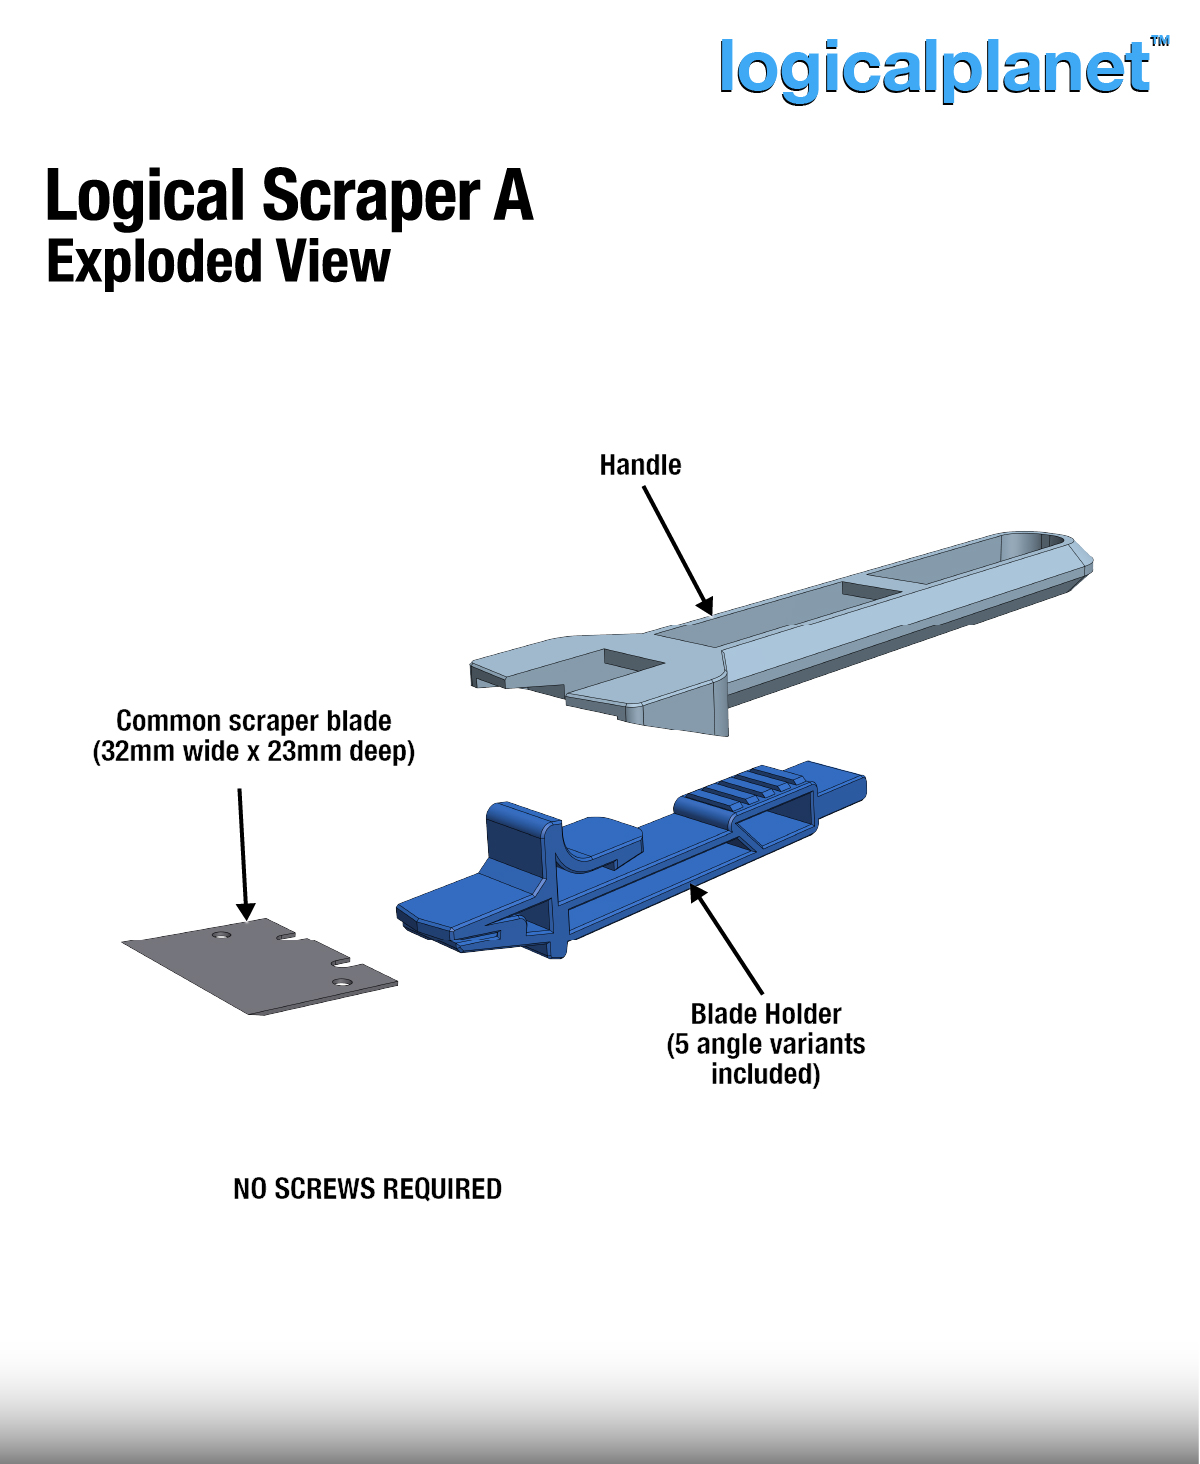
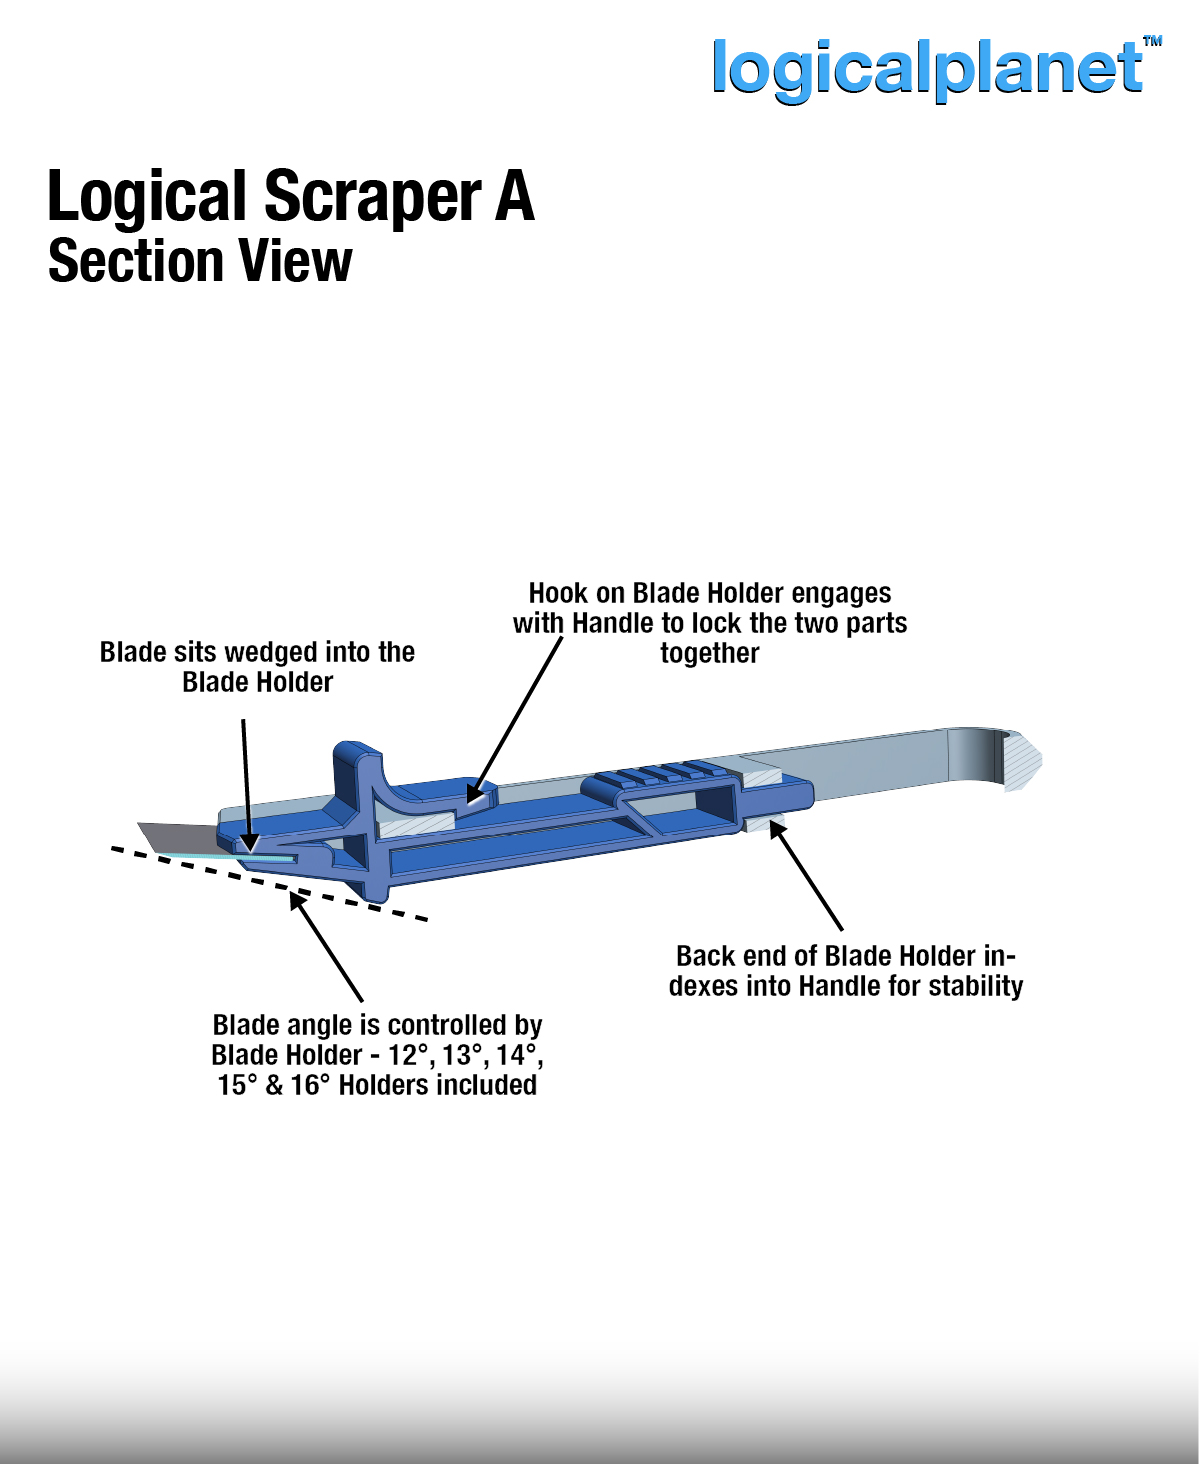
The engineer’s scraper. Model A is a two-piece snap-together design with five interchangeable blade holders at angles of 12, 13, 14, 15, and 16 degrees. The handle and blade holder click together using printed hooks and a positive index feature that confirms the holder is fully seated before use.
- 2 pieces — handle + interchangeable blade holder
- 5 blade angle options: 12, 13, 14, 15, 16 degrees
- No screws — snap-together only
- Blade holders swap without tools
- Positive index confirms full seating
Model B — 1 Piece, No Assembly
The minimalist’s answer. One piece. Print it. Install the blade. Done. After designing Model A, I challenged myself to eliminate assembly entirely — no hooks, no indexing, no sliding parts. The blade wedges directly into the handle, and an inspection window lets you confirm full seating before you put it to work. Selectable blade angles are four separate variants: 13, 14, 15, and 16 degrees, with the angle embossed on the handle so you always know which one you’re holding.
Key Parts & Mechanisms
- Blade slot — precision-fit channel sized for standard 32 mm × 23 mm scraper blades
- Snap hooks (Model A) — printed hook-and-index system; positive click confirms full seating
- Inspection window (Model B) — confirms blade is fully inserted before use
- Embossed angle label (Model B) — angle is cast into the handle so you never guess which variant you’re holding
- No screws — no stripped holes, ever
Which Angle Should I Print?
I’ve tried them all and find 15 degrees to be the sweet spot for most print removal tasks — but your preference may vary depending on your bed surface and material. Start with 15° and experiment from there.
Printing Notes & Recommended Settings
- Material: PETG recommended; PLA also works
- Nozzle: 0.4 mm
- Layer Height: 0.2 mm
- Walls: 4 (1.6 mm)
- Infill: 40%
- Support: None required
- Print Orientation: As per the included 3MF/STL files
Post-Print Setup — Blade Installation
⚠️ The scraper blade is extremely sharp and capable of causing serious injury. Handle the blade with pliers only — never bare hands.
For Model A: snap the blade holder into the handle until you feel the index click, then use pliers to press the blade firmly into the holder slot until it seats fully.
For Model B: use pliers to press the blade into the slot from the open end. Check through the inspection window to confirm the blade tip is fully seated before use.
Where to Get My STL Files
All my designs are available on Thangs.com.
Use, Licensing, Comments and Feedback
Some of my designs are only available for free for 1 week from when first posted, so please download them when you see a new file available that you are interested in. Also, please like and save the file too as it helps with my ratings.
I do not permit the use of my designs for commercial purposes (i.e. you can not sell my design(s) or products printed from my design(s)) without first acquiring a commercial license from me. On Thangs.com I offer membership accounts for access to all my design files as well as a membership for commercial licensing which allows subscribers to sell printed products using my designs.
I welcome comments and feedback as well as requests for customization of designs. I will do my best to accommodate reasonable requests.
Leave a Reply