
A Simple Way to Get Recycling Bins Off the Ground
Click here to download STL (Affiliate Link)
Download the Blue Bin Hanger on Thangs
This is one of those “Why buy it when I can print it?” projects.
I wanted to get my blue recycling bins off the ground and organized. I did not need a complicated storage system—just a small, strong wall-mounted hanger that would hold the rim of each bin securely while keeping the bins easy to lift off when I needed them.
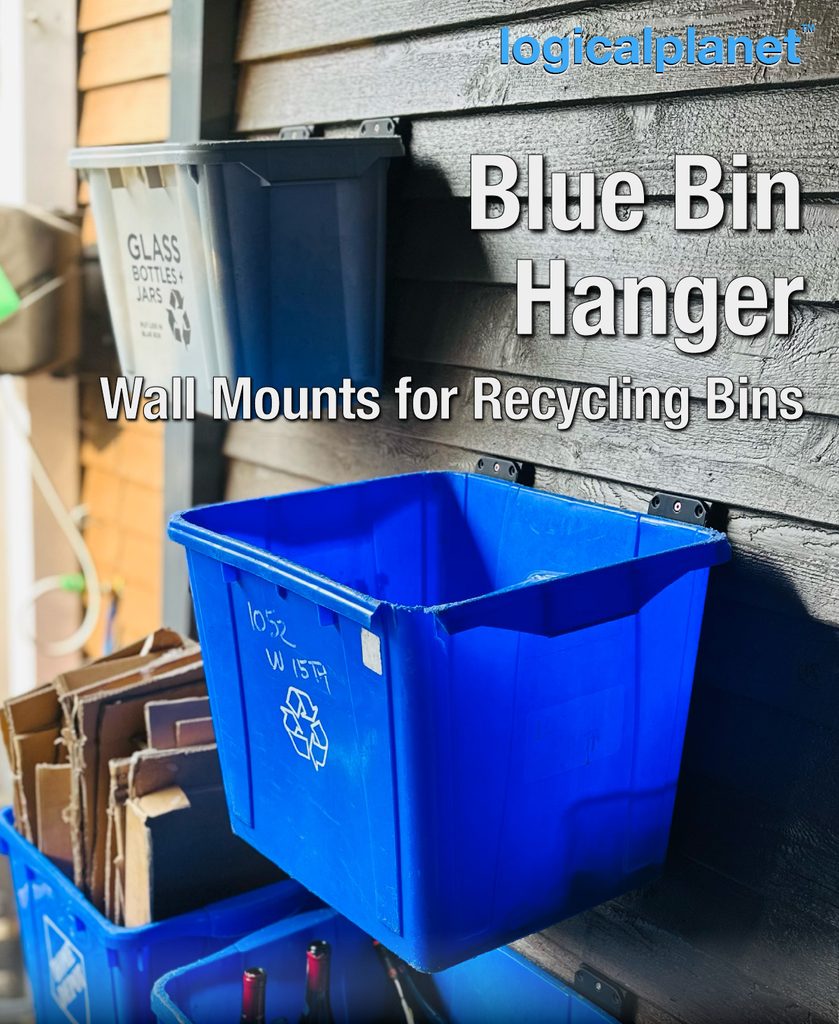
The result is the Blue Bin Hanger: a simple and very useful print that turns an unused section of wall into practical recycling-bin storage.
Getting the Bins Up and Out of the Way
Blue bins are useful, but they tend to occupy a surprising amount of floor space. Mine were sitting on the ground, where they looked untidy and made the area harder to keep organized.
The obvious answer was to hang them on the wall. The top rim of the bin already provides a strong, convenient place to support it, so the design only needed to capture that rim securely and let the bin lift on and off without fuss.
That is really the whole idea behind this project. It is not intended to be mechanically elaborate. It is a purpose-built part that solves a small, everyday problem—and it is exactly the kind of job for which having a 3D printer is so useful.
A Small Hanger with Some Useful Flexibility
The hanger is split into two receiving sections. This lets it accommodate smaller bins whose upper rims contain more ribs, rather than requiring one wide uninterrupted section of rim.
Each hanger requires only one screw, although it includes mounting holes for as many as six. I recommend using three screws for a secure installation. The spacing between the left and right hangers can be adjusted to suit the particular bin; mine are installed approximately 290 mm (11.5 inches) apart.
I also included an optional wedge for installation on sloped siding. The wedge compensates for the angle so the hanger itself can sit in the correct orientation. On a flat wall, the hangers can be installed without it.
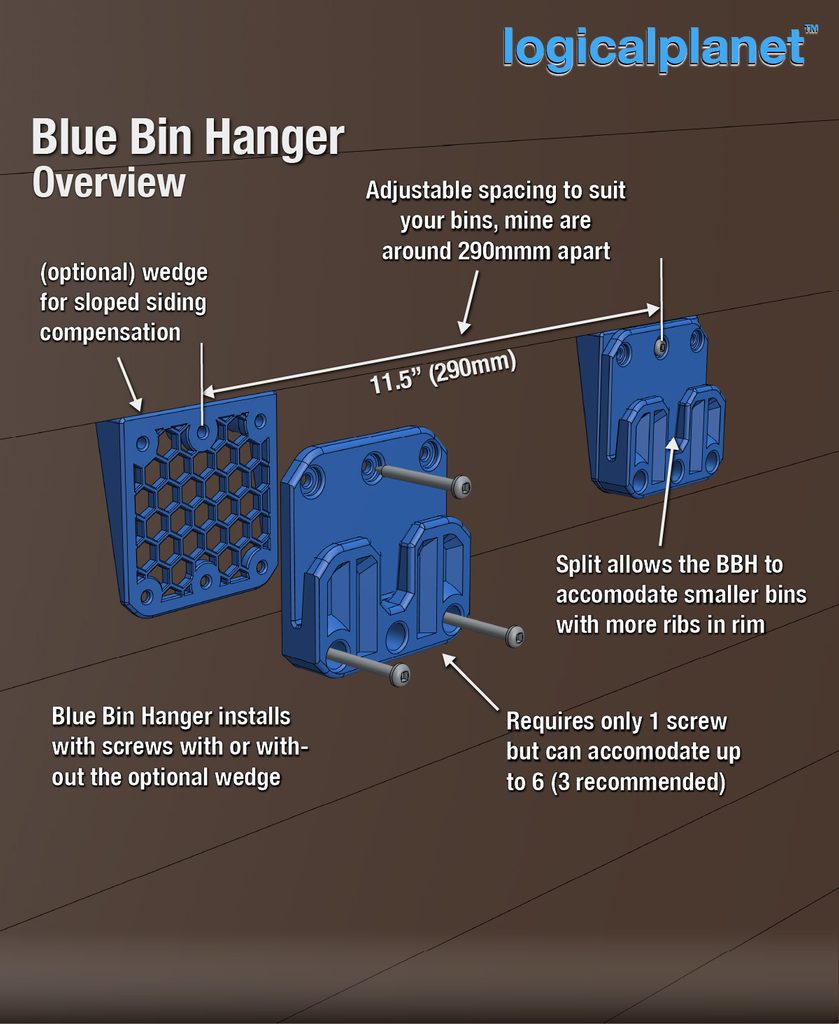
Because the two hangers are positioned independently, there is no fixed rail or frame dictating their spacing. Set them to match your bin, fasten them to the wall, and the rim of the bin drops into place. The bin stays off the ground but remains easy to remove whenever it is time to use or empty it.
Dimensions
Each Blue Bin Hanger measures:
- 80 mm wide
- 80 mm high
- 18 mm deep
- 6 mm mounting-plate thickness
- 48 mm overall height at the front hook
- 28 mm hook height
The detailed drawing below includes the mounting-hole spacing and the dimensions of the two receiving sections.
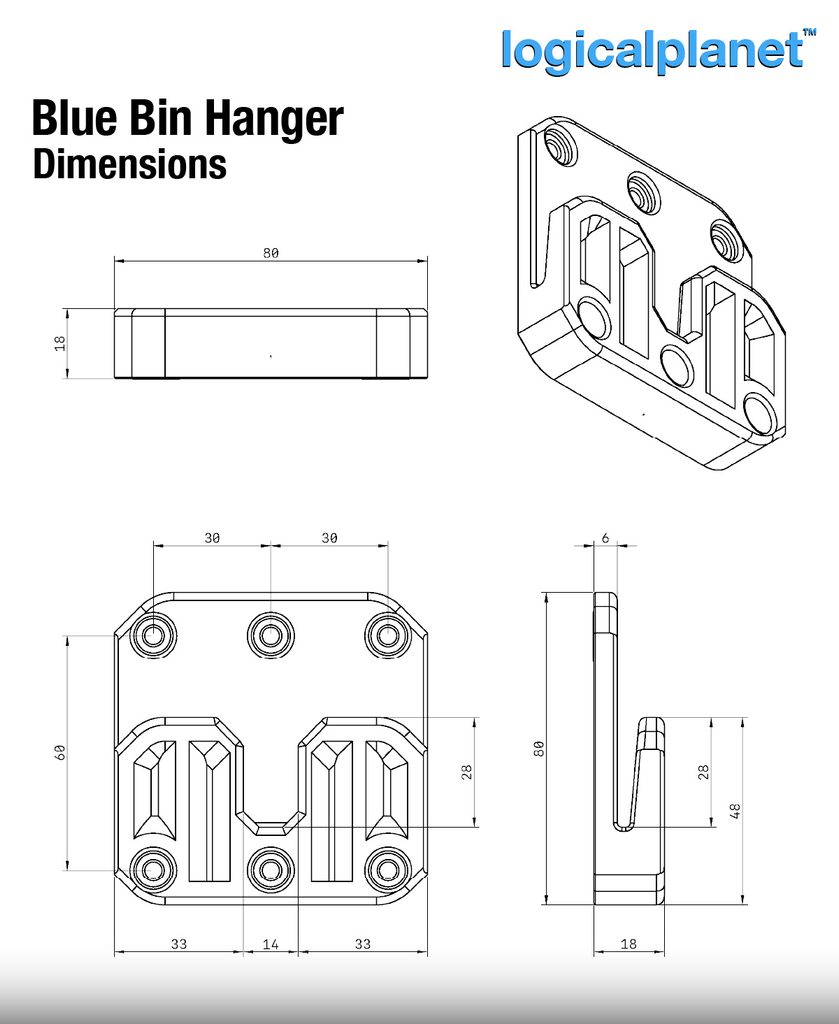
Before mounting the hangers, check the shape and rib spacing of your own bin rim and determine the best distance between the two hangers. The approximately 290 mm spacing shown in my installation is a reference, not a required fixed dimension.
Printing the Hangers
This is a functional, load-bearing print, so strength matters more than it would for a decorative model. I recommend reviewing the slicer settings carefully rather than relying on a typical default profile.
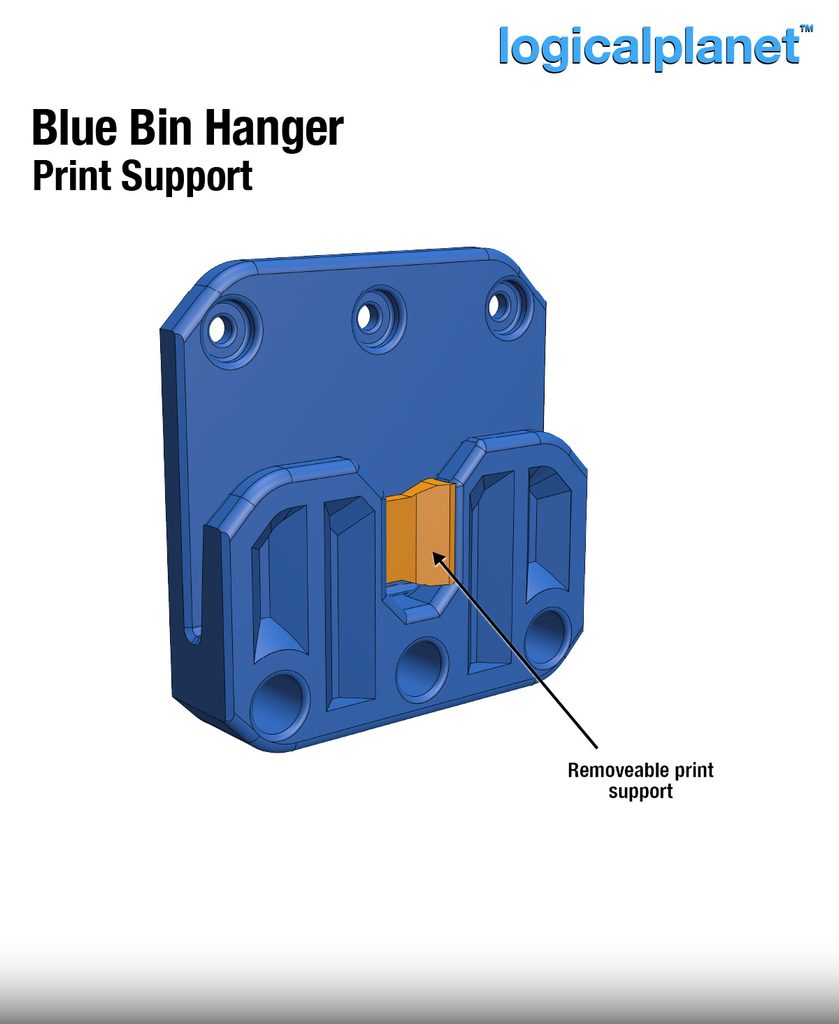
The files are supplied in the intended print orientation. No slicer-generated supports are required. A small removable support is built into the model where needed; remove it after printing.
My recommended settings are:
| Setting | Recommendation |
|---|---|
| Material | ASA for outdoor use; PETG for indoor or sheltered use |
| Nozzle diameter | 0.4 mm |
| Layer height | 0.2 mm |
| Line width | 0.4 mm |
| Walls | 4 (1.6 mm) |
| Top / bottom | 5 (1.0 mm) |
| Wall generator | Arachne or equivalent |
| Detect thin walls | On, if available |
| Infill | 70% cubic |
| Brim / raft | Use a raft of 4–6 layers to help prevent the part from lifting from the print surface |
| Supports | No slicer-generated supports; built-in supports are included where required |
| Print orientation | As supplied in the STL/3MF files |
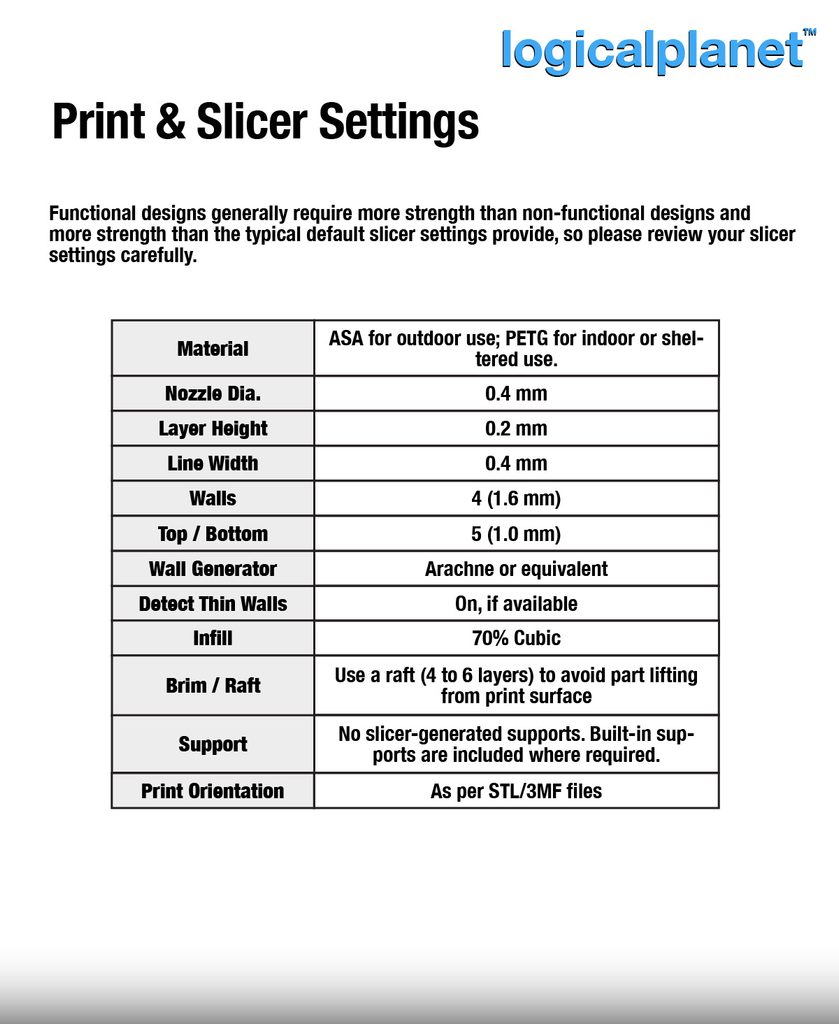
I use ASA for an outdoor installation because it is better suited to weather and UV exposure. PETG is suitable for indoor or sheltered locations. As with any wall-mounted functional print, the strength of the installation also depends on using appropriate fasteners and attaching the hangers to a suitable supporting surface.
Installation
Installation is straightforward:
- Hold the bin against the wall at the height where you want it stored.
- Identify sections of the upper rim that fit securely into the split hanger profile.
- Mark the position of both hangers. My hangers are approximately 290 mm apart, but yours can be spaced to suit your bin.
- If mounting on sloped siding, place the optional compensation wedge behind each hanger.
- Fasten each hanger to a suitable supporting surface. One screw is the minimum the design accommodates; up to six can be used, and I recommend three.
- Lower the rim of the bin into the two hangers and confirm that it is properly seated before loading the bin.
Fastener selection will depend on the wall material and what is behind it, so use screws and anchors appropriate to your installation.
One of Those Satisfying Little Prints
Not every useful 3D-printing project has to be a complicated mechanism or a large assembly. Sometimes the best designs are the small ones that solve an annoyance and then quietly keep doing their job.
For me, this was simply a matter of getting the blue bins off the ground and giving them a proper place. A couple of compact printed parts did exactly that. The area is tidier, the floor is easier to keep clear, and the bins are still immediately accessible.
If you have similar recycling bins taking up floor space, you can download the Blue Bin Hanger from Thangs and adjust the mounting spacing to suit your own setup.
Download the Blue Bin Hanger on Thangs
If you print it, I would be interested to see how you use it—and whether your local blue bins have the same rim style as mine.
Leave a Reply